Custom Shopping Cart (Analytics Pixel)
Have a custom-built shopping cart or something we don't have an existing integration for? Perhaps you're building an API-powered display. No Problem, this guide will help make sure you're still getting analytics into Pixlee.
Tracking Pixel Setup
The tracking pixel is used for two purposes:
- To track time-on-site and revisit engagement for your website
and
- To get detailed, photo-level conversion and engagement data for all of your products powered by Pixlee E-commerce
Get Your Pixlee API Keys
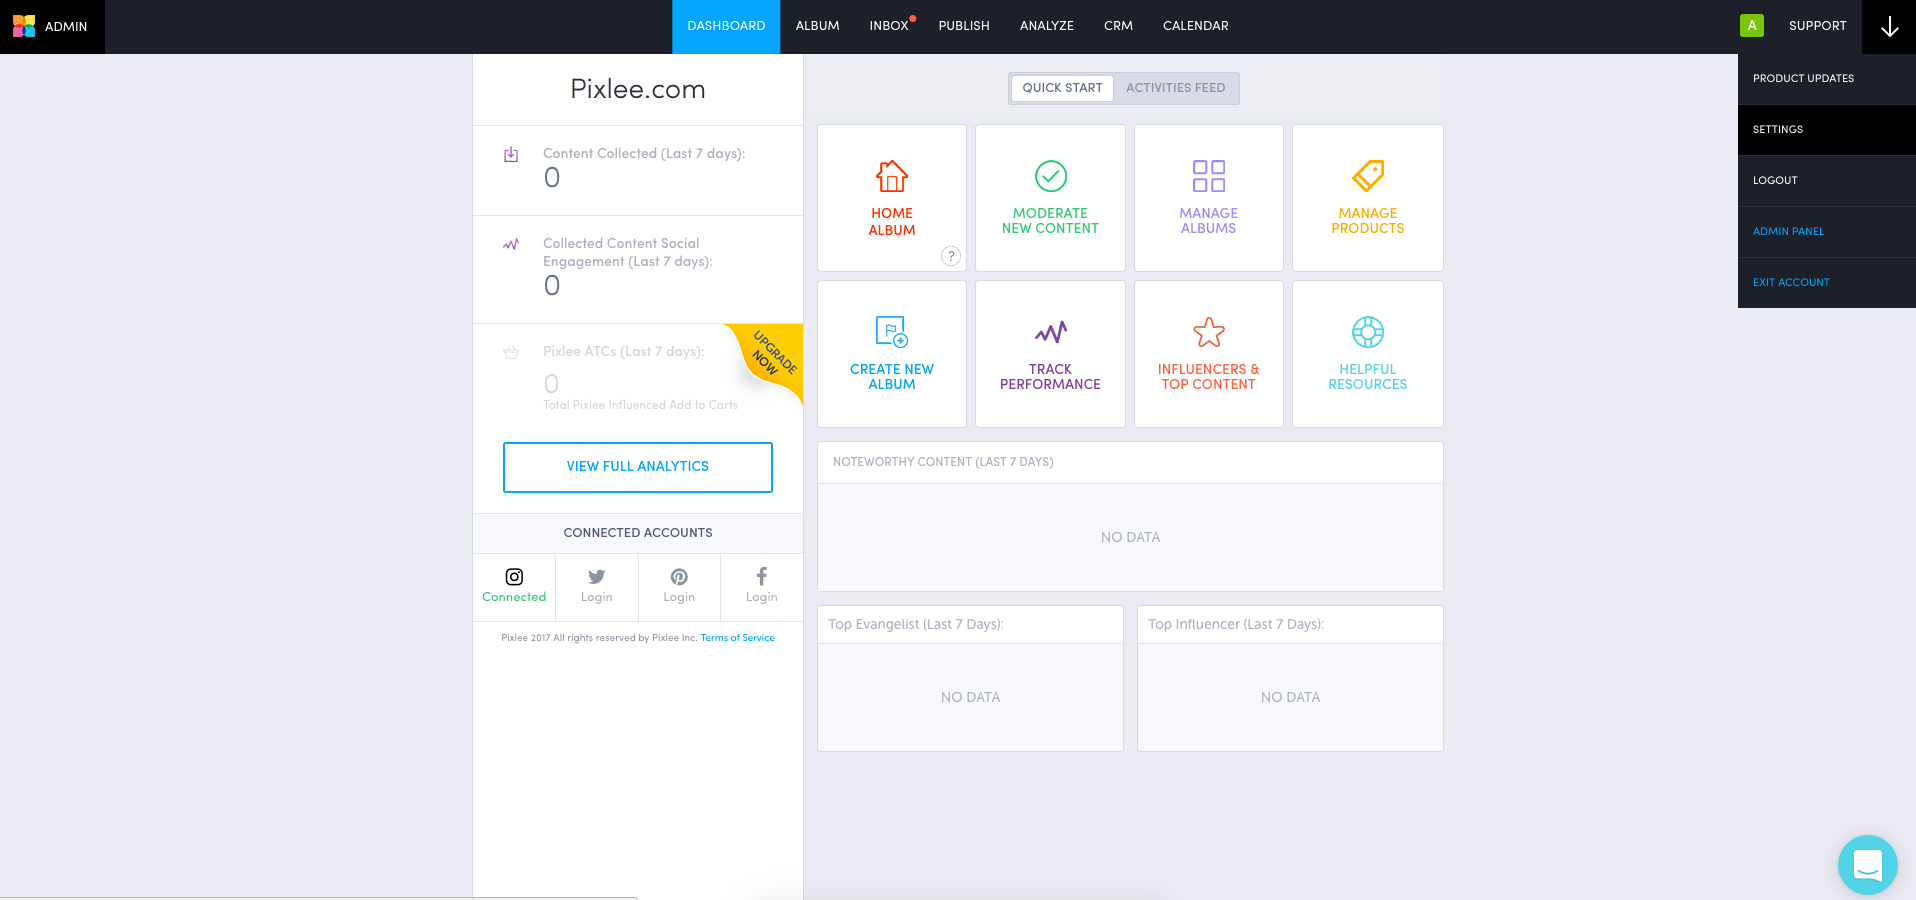
- First, log in to https://www.pixlee.com and click on the Settings button inside the top right hamburger menu.
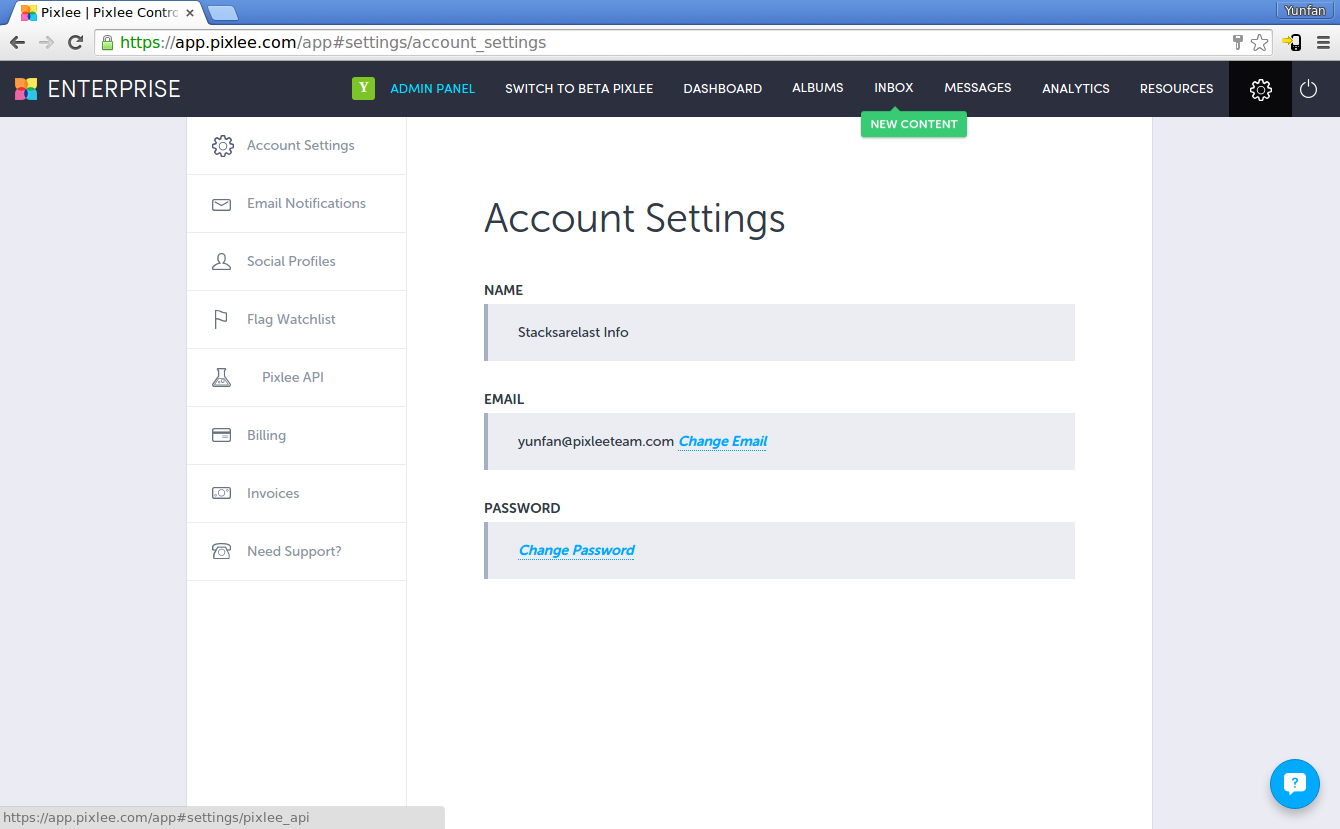
(Alternatively, point your browser to https://app.pixlee.com/app#settings/account_settings while logged in).

The settings page should look like this:

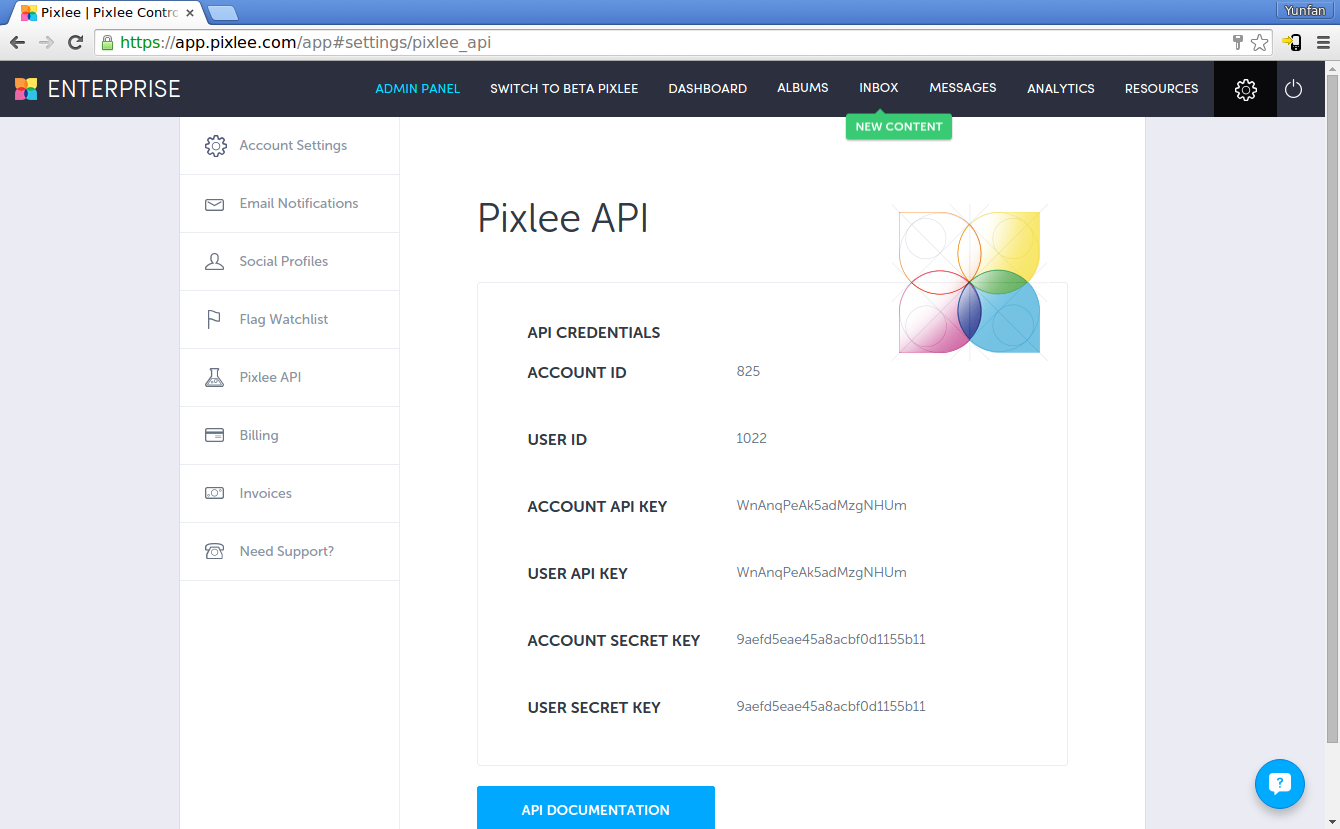
- Click on Pixlee API on the lefthand navigation bar.
From this page, record the value of Account API Key, we'll need it later.

Embed The Tracking Pixel
Copy paste the following script onto all webpages. If using a CMS, there will generally be a header or footer file that are implemented by all pages that you can paste this script into. We recommend placing this as early as possible. If using a tag manager like GTM, embed this in a custom HTML tag which loads into all webpages
<script id='pixlee_script' src="https://assets.pixlee.com/assets/pixlee_events.js"></script>
<script type="text/javascript">
    if (typeof Pixlee_Analytics !== 'undefined') {
        pixlee_analytics = new Pixlee_Analytics("Your_API_key");
    }
</script>
IMPORTANT: In the above snippet, replace 'Your_API_key' with your Account API Key that you recovered in the previous step.
If you are simply tracking time-on-site and revisit engagement, you are done! If you are also looking to track conversion analytics, please read on.
Trigger Inbound Analytics Events
Now it is time to set up Engagement and Conversion events. A basic understanding of Javascript and jQuery is highly recommended. If you are embedding Pixlee widgets, you may skip the Engagement events section of these instructions. These instructions are for if you have used the Pixlee API to create your own display experience.
Engagement (SKIP IF YOU ARE EMBEDDING PIXLEE WIDGETS)
- Visits a page with a Pixlee widget
- Pixlee widget is visible
- Clicks on the Pixlee widget to open a lightbox
- Takes an action after clicking on an item. Example - Clicks 'BUY NOW'
- Loads more photo content for vertical style widgets
- Navigates right for horizontal style widgets
Conversion
Note that Conversion events will only show up in Pixlee analytics if a Pixlee widget is involved. Therefore, for full funnel testing, it is recommended that a Pixlee widget be embedded and visited before triggering the Add to Cart and Complete Checkout events.
User Visits a Page with a Pixlee Widget (skip if you are embedding pixlee widgets)
Call this whenever a user visits a page which as a Pixlee Widget on it
if (typeof pixlee_analytics !== 'undefined') {
    pixlee_analytics.events.trigger('opened:widget', {...})
}
Required parameters:
- album_id: Pixlee album id of the album on the page
- widget: Style of the widget (For Example - widget: Horizontal)
The Pixlee Widget is in the viewport of the person browsing (skip if you are embedding pixlee widgets)
Call this whenever a user scrolls down or can see the Pixlee widget within the viewport of their screen
if (typeof pixlee_analytics !== 'undefined') {
    pixlee_analytics.events.trigger('widget:visible', {...})
}
Required parameters:
- album_id: Pixlee album id of the album on the page
- widget: Style of the widget (For Example - widget: Horizontal)
User Clicks on the Pixlee Widget (skip if you are embedding pixlee widgets)
Call this whenever a user clicks on an item in the Pixlee widget
if (typeof pixlee_analytics !== 'undefined') {
    pixlee_analytics.events.trigger('opened:lightbox', {...})
}
Required parameters:
- album_id: Pixlee album id of the album on the page
- album_photo_id: ID of the photo that was clicked
User clicks a Call to Action on an Item Lightbox (skip if you are embedding pixlee widgets)
Call this whenever a user clicks on a CTA in a lightbox in the Pixlee widget
if (typeof pixlee_analytics !== 'undefined') {
    pixlee_analytics.events.trigger('action:clicked', {...})
}
Required parameters:
- action_link_url: The link that was clicked
- album_id: Pixlee album id of the album on the page
- album_photo_id: ID of the photo that was clicked
User clicks 'Load More' button on the widget (skip if you are embedding pixlee widgets)
Call this whenever a user clicks 'Load More' button on the widget
if (typeof pixlee_analytics !== 'undefined') {
    pixlee_analytics.events.trigger('load:more', {...})
}
Required parameters:
- album_id: Pixlee album id of the album on the page
- page: Equivalent to number of times "Load More" was clicked
User navigates right on the Widget (skip if you are embedding pixlee widgets)
Call this whenever a user clicks the 'right' button on the widget
if (typeof pixlee_analytics !== 'undefined') {
    pixlee_analytics.events.trigger('nav:right', {...})
}
Required parameters:
- album_id: Pixlee album id of the album on the page
Add to Cart
Call this whenever and wherever an add to cart event happens
if (typeof pixlee_analytics !== 'undefined') {
     pixlee_analytics.events.trigger('add:to:cart', {...})
}
Required parameters:
- product_sku: Your product's SKU (should correspond to the product SKU in Pixlee)
- quantity: Number of product added (integer)
- price: Price of the product (string, can include currency symbol)
Recommended Parameters:
- currency: ISO 4217 Currency Code of the purchase
Example:
if (typeof pixlee_analytics !== 'undefined') {
    pixlee_analytics.events.trigger('add:to:cart', {
        'product_sku': 'SL-BENJ',
        'price': '13.00',
        'quantity': 1,
        'currency': 'USD'
    });
 }
Generally, there should be a way in your product page configuration to extract data about the product that the user is adding on the page. Once you have that information, you simply need to fire the trigger call when the user presses Add to Cart. We recommend utilizing the jQuery .click() event, which allows you to bind the trigger event to a button. See more information here.
A successful trigger should show up in the Network tab as a 200 call to inbound-analytics.pixlee.com/events/addToCart.
User Completes Checkout
Call this whenever a user completes a checkout and makes a purchase
if (typeof pixlee_analytics !== 'undefined') {
    pixlee_analytics.events.trigger('converted:photo', {...})
}
Required parameters:
- cart_contents: (product_sku, quantity, and price for each product)
- cart_total: Total price of cart (string)
- cart_total_quantity: Total quantity of items in the cart (integer)
Recommended Parameters:
- order_id: Defines the id of the order in your ecommerce platform. We only track 1 conversion event per order_id.
- currency: ISO 4217 Currency Code of the purchase
Example:
if (typeof pixlee_analytics !== 'undefined') {
    pixlee_analytics.events.trigger('converted:photo', {
        'cart_contents': [
            {
                'price': '13.00',
                'product_sku': 'SL-BENJ',
                'quantity': 1
            },
            {
                'price': '5.00',
                'product_sku': 'AD-1324S',
                'quantity': 2
            }
        ],
        'order_id': 234232,
        'cart_total_quantity': 3,
        'cart_total': '18.00',
        'currency': 'USD'
    });
}
Often times, your website will have a page for Checkout Completion, taking the user to a confirmation page where they are informed of their purchase details. This is the perfect page to load and fire this event - no click bind needed.
A successful trigger should show up in the Network tab as a 200 call to inbound-analytics.pixlee.com/events/conversion.
Updated 2 months ago
