SiteGenesis (Pipelines)
Documentation for SalesForce Commerce Cloud SiteGenesis stores using Pipelines [Formerly Demandware]
This documentation is only for Pixlee clients using SiteGenesis with Pipelines. If you are using SiteGenesis with Controllers, refer to the Salesforce Commerce Cloud - SFRA & SiteGenesis documentation.
Installing the Pixlee SiteGenesis pipeline Cartridge
The Pixlee Salesforce Commerce Cloud (SFCC) cartridge works with Pixlee API to provide analytics information and data exportation functionalities. This integration document explains the deployment of a generic cartridge, storefront cartridge and new business manager configurations.
The cartridge has two responsibilities
- Keep the product catalog in your store synced with Pixlee.
- Make appropriate API calls at events like Add to Cart and Purchase time.
Feel free to reach out to us here in case you're not sure about something or have any questions.
This document will explain how to install and test both so let's get started.
Get Your Pixlee API Keys
Before installing the Pixlee SFCC SiteGenesis cartridge, we need to get the Account API Key and the Account Secret Key. Please refer to Getting your API Keys before continuing.
Get Pixlee Product and Category Page Widget IDs
Before installing the Pixlee SFCC SiteGenesis cartridge, we'll need to get two widget IDs from Pixlee Publish Center: one for product detail widget and another for category detail page.
- Log in to your Pixlee Dashboard and navigate to the Publish Center tab.
(Alternatively, point your browser to https://app.pixlee.com/app#publish while logged in).
- Click the "Install Product Displays" and it should present you with a lightbox that looks like following.
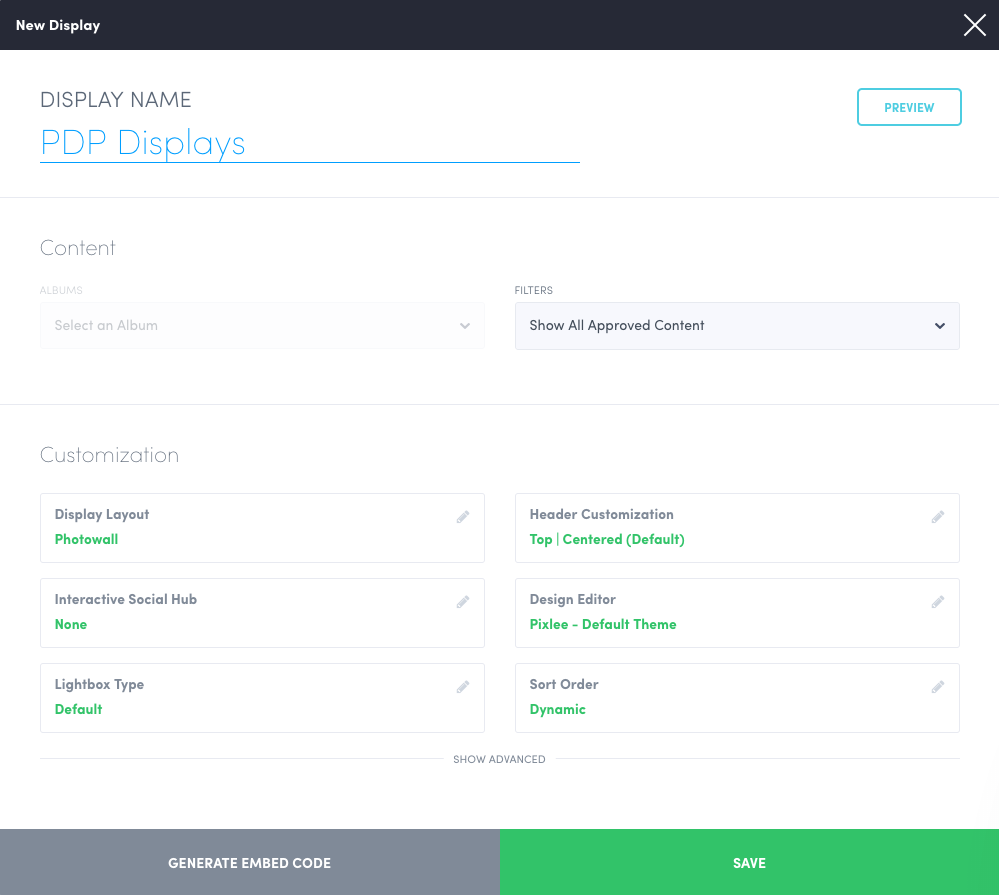
- Customize the widget as you wish. In the end, press the "Generate Embed Code" button and you'll be presented with an embed code.
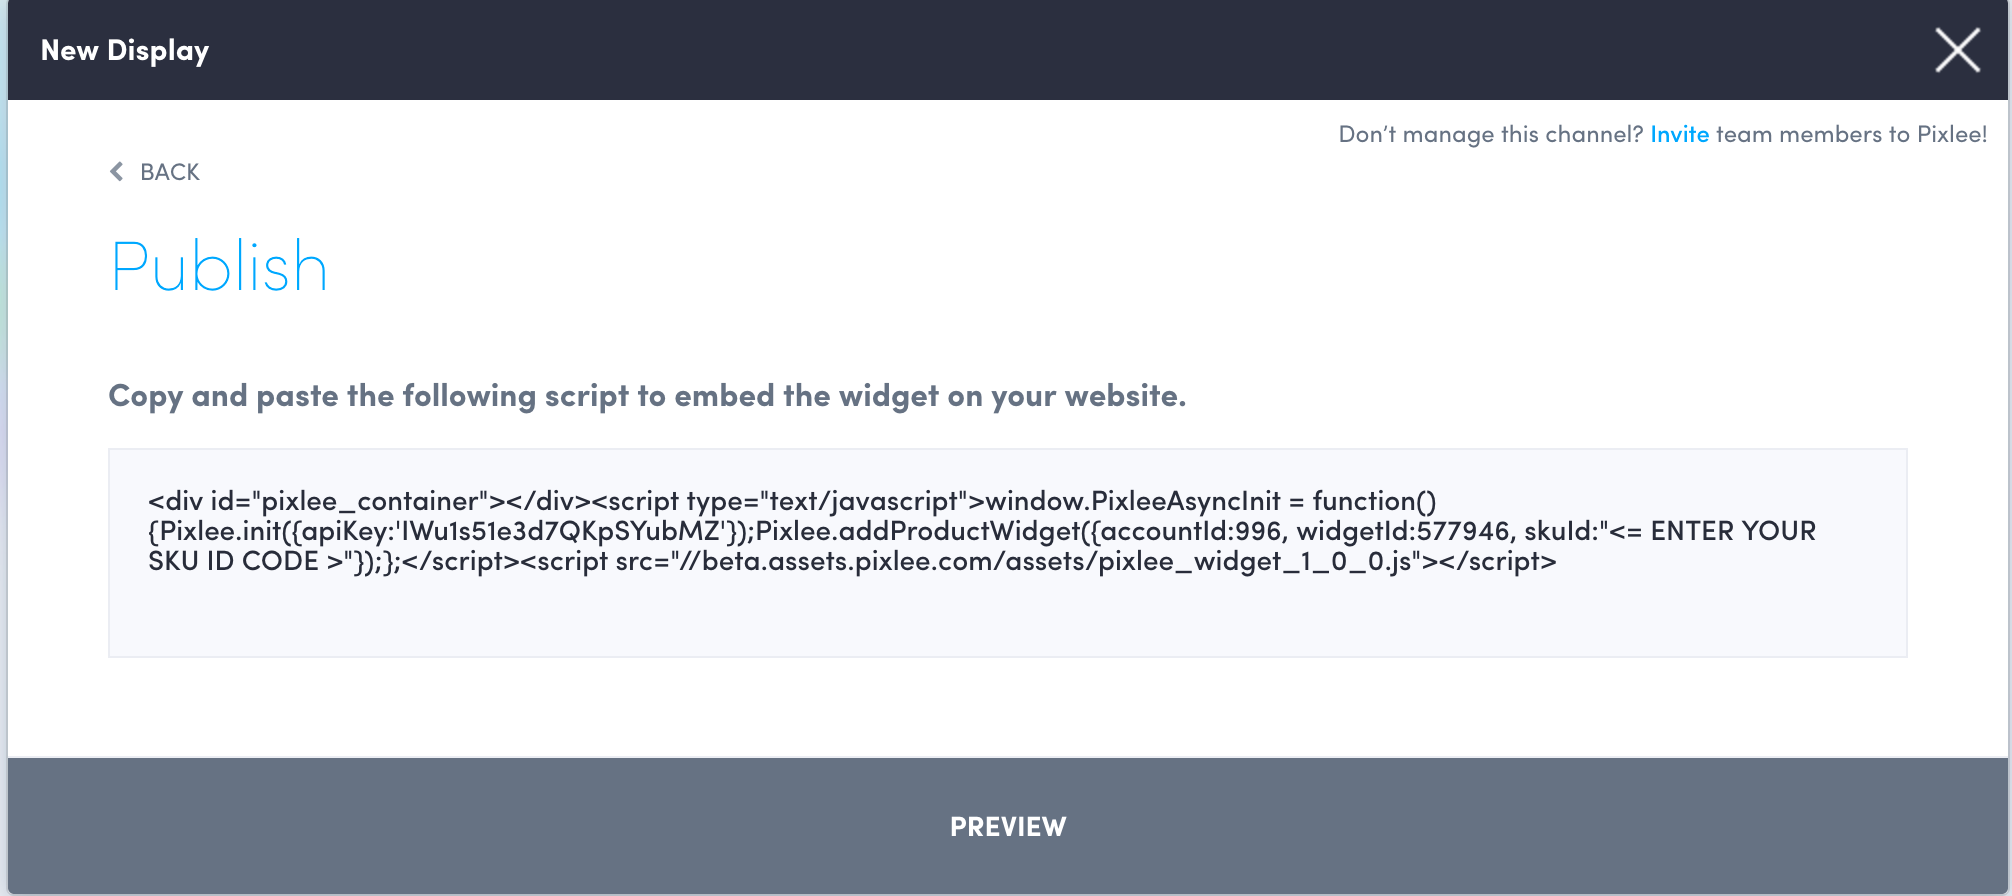
- The Widget IDs is the number next to the
widgetId:. For example, for the screenshot, the widget ID would be 577946. Please record this number because we'll need in one of the later steps. - Repeat the steps 1-4 and generate a separate widget ID for category details pages.
Prepare your site for Integration
This code is only for SiteGenesis using Pipelines. All other clients should refer to the Salesforce Commerce Cloud - SFRA & SiteGenesis documentation.
You can download the latest SiteGenesis Pipeline cartridge files from the Pixlee Saleforce Commerce Cloud Repository sitegenesis branch. In the Pixlee salesforce-commerce-cloud repository, ensure you have selected the sitegenesis branch. Click the Code button and select Download ZIP from the dropdown.
To save yourself some context switching, we're going to tell the SFCC site manager about the cartridge we're about to install before actually uploading it.
This way once we start up Eclipse, we can install the cartridge and go straight into integrating the site with it.
Add Cartridge Definitions to Storefront and Business Manager
We're going to tell the Storefront and Business Manager sites to start looking for the int_pixlee cartridge.
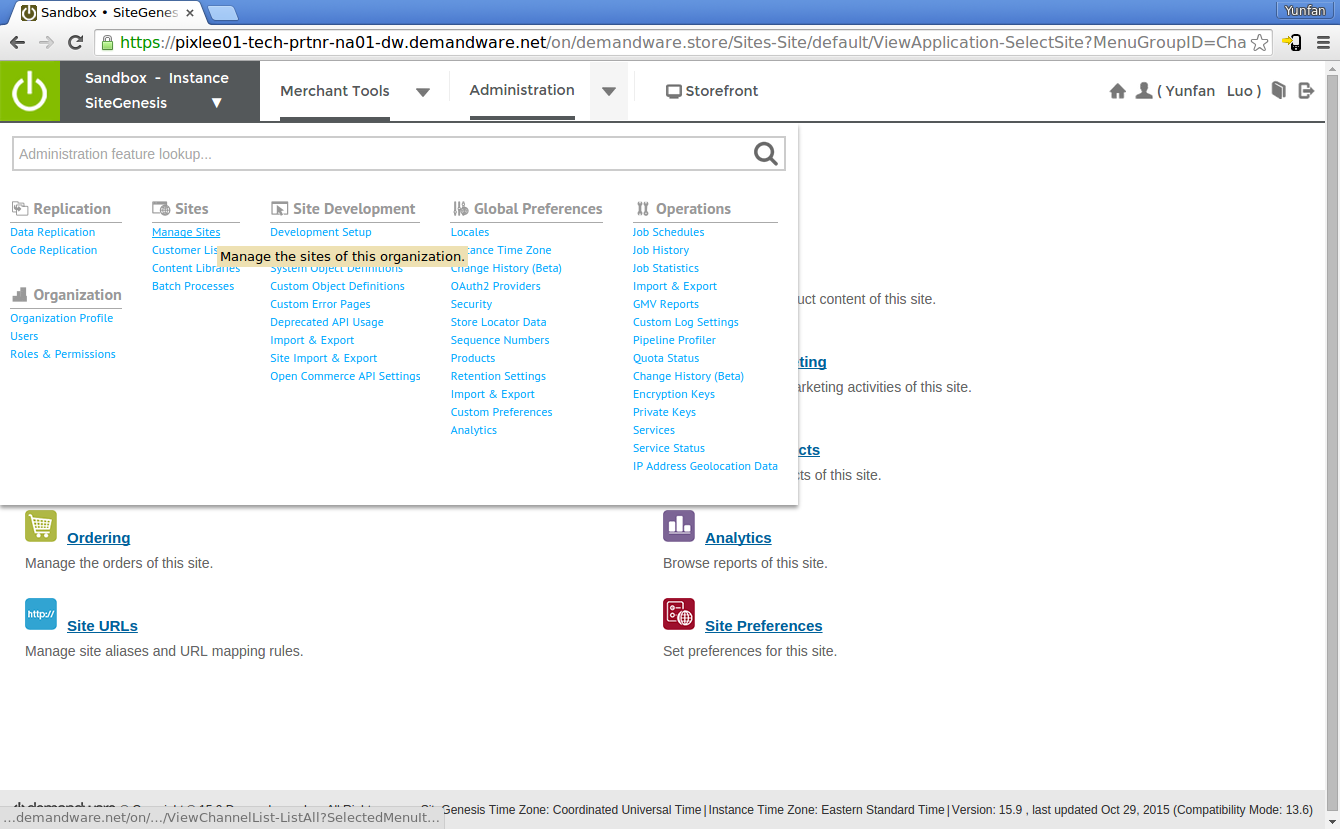
- Log in to your SFCC Business Manager.
Click the arrow next to Administration.
In the dropdown that appears, under Sites, click on Manage Sites.
-
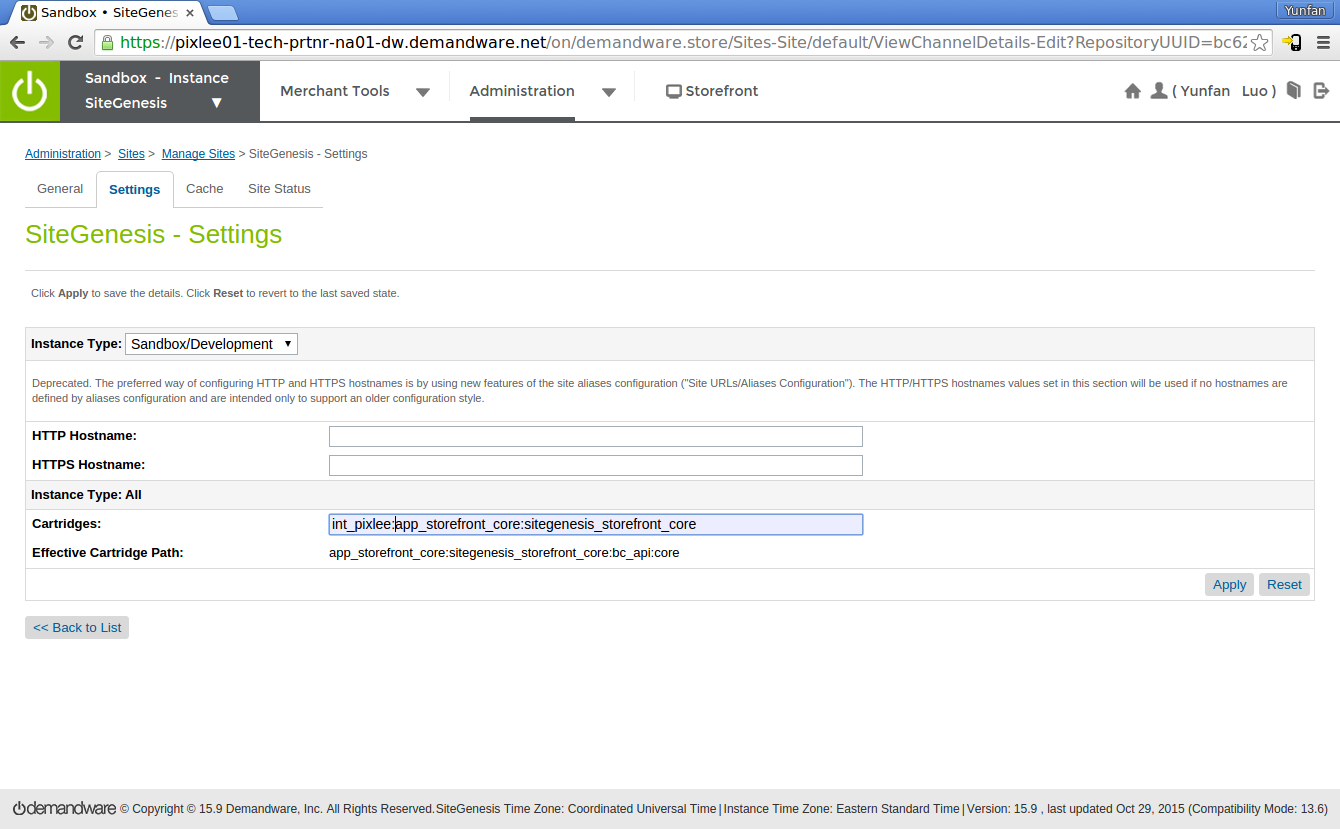
Choose your storefront site and click on the Settings tab. Under Instance Type: All, in the text box to the right of Cartridges, prepend the following:
int_pixlee:
Make sure to include the colon (:).
Click Apply.
The result should look something like this.
- Click on Back to List at the bottom of the page.
Instead of Storefront - Site look for the link under Business Manager - Site
Click on the link that's inside the phrase:
Manage the Business Manager site.
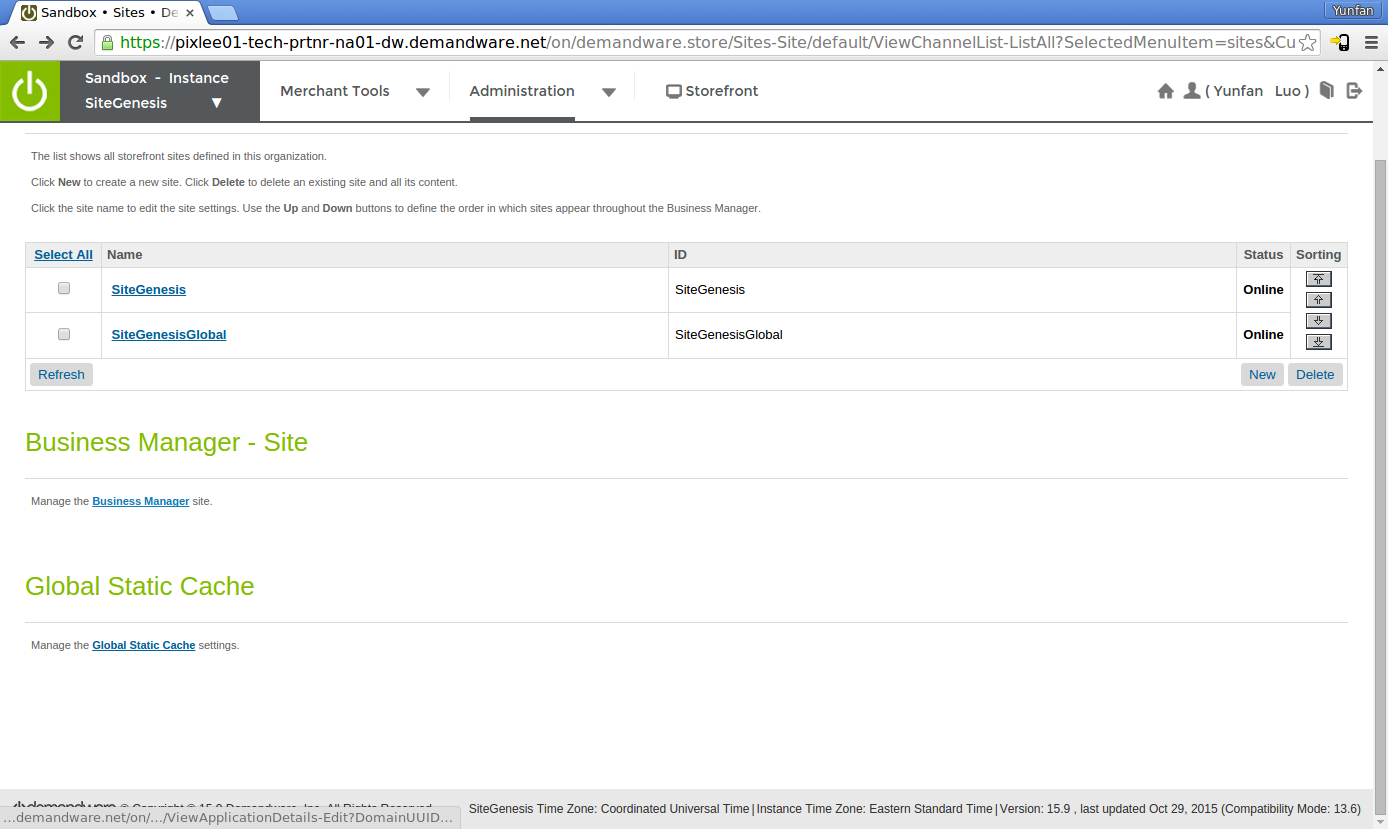
- Like for the Storefront - Site,
Add int_pixlee: to the Cartridges fields.
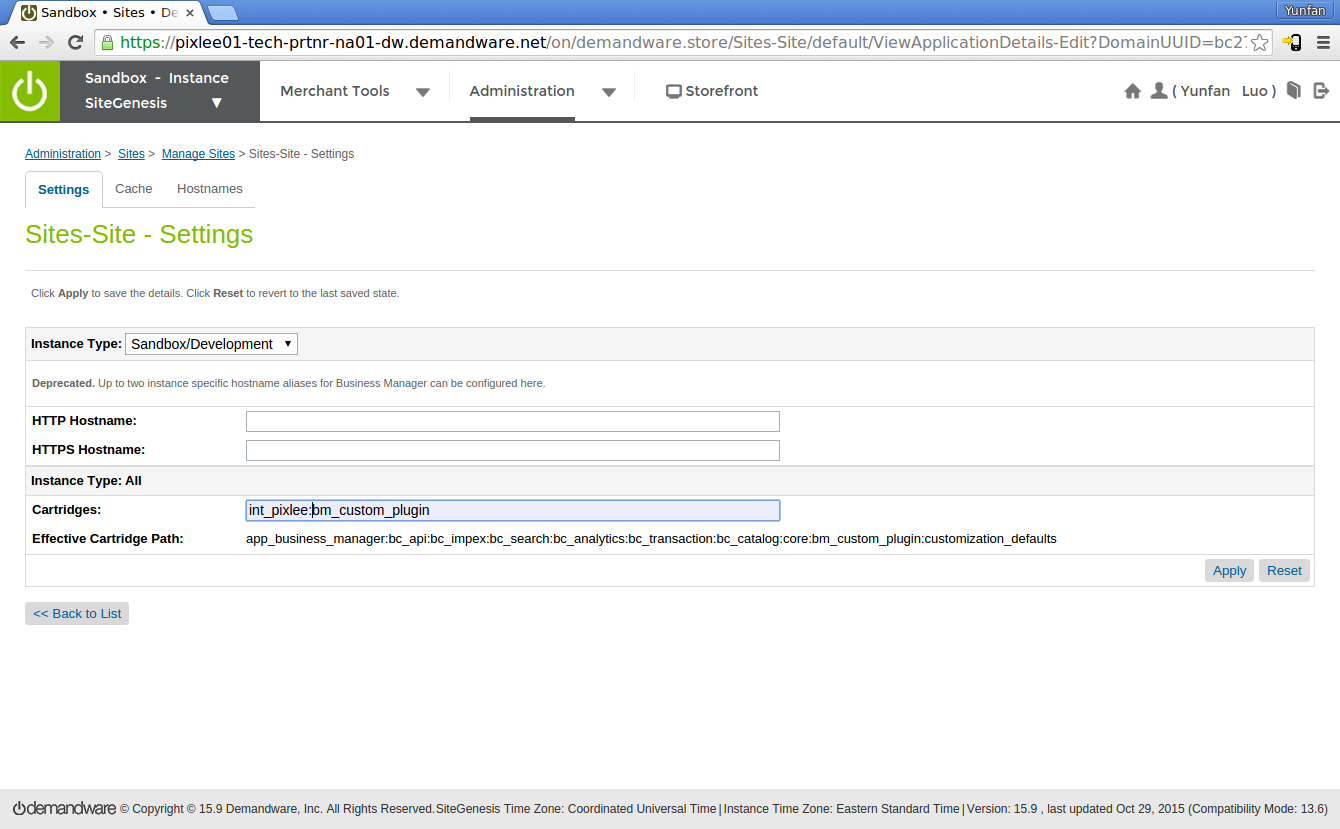
Click Apply.
Upload Preference Files
- Click the arrow next to Administration.
In the dropdown that appears, under Site Development click on Import & Export.
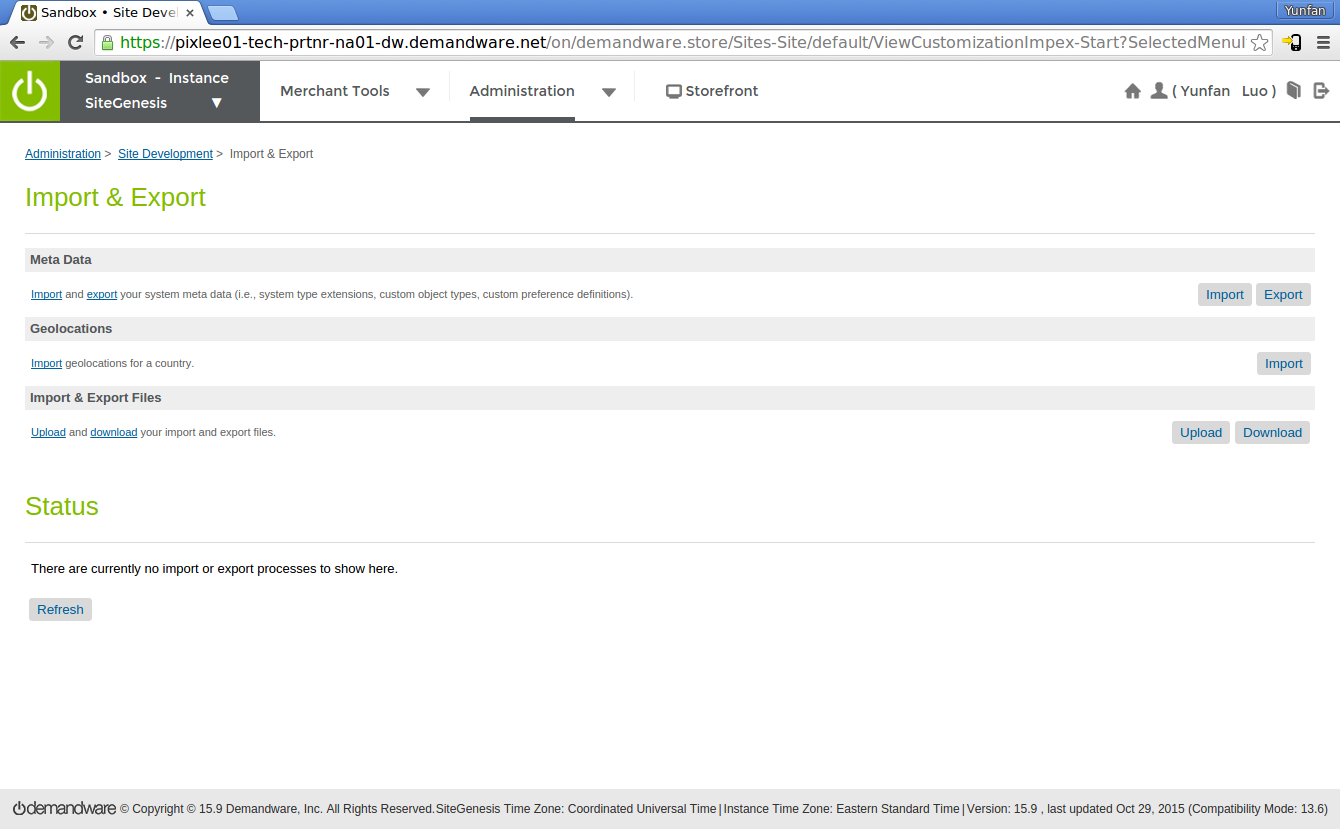
- In the Import & Export Files section, click on the Upload button.
The page will refresh, and a dialog to upload a file will appear at the top of the page.
Click on Choose File and navigate to demandware-link_pixlee-16e7bb348295/metadata/metadata.xml.
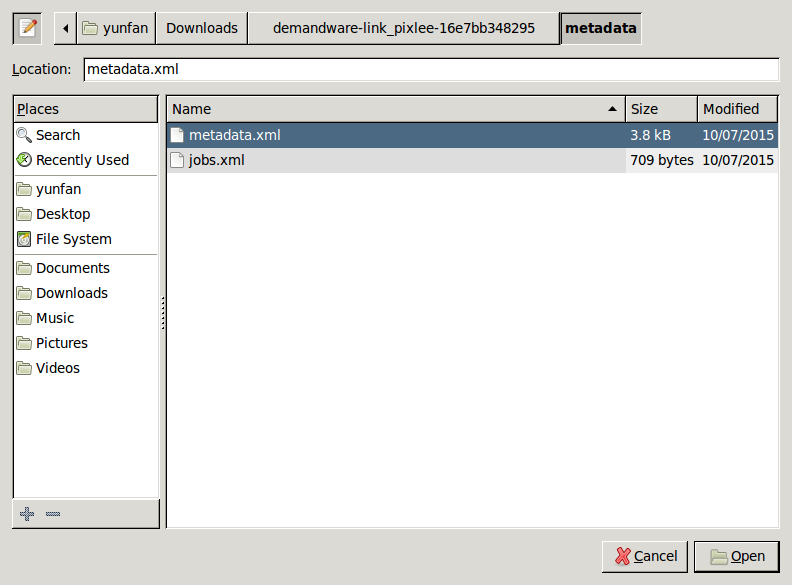
Click on Upload on the right to finish the upload.
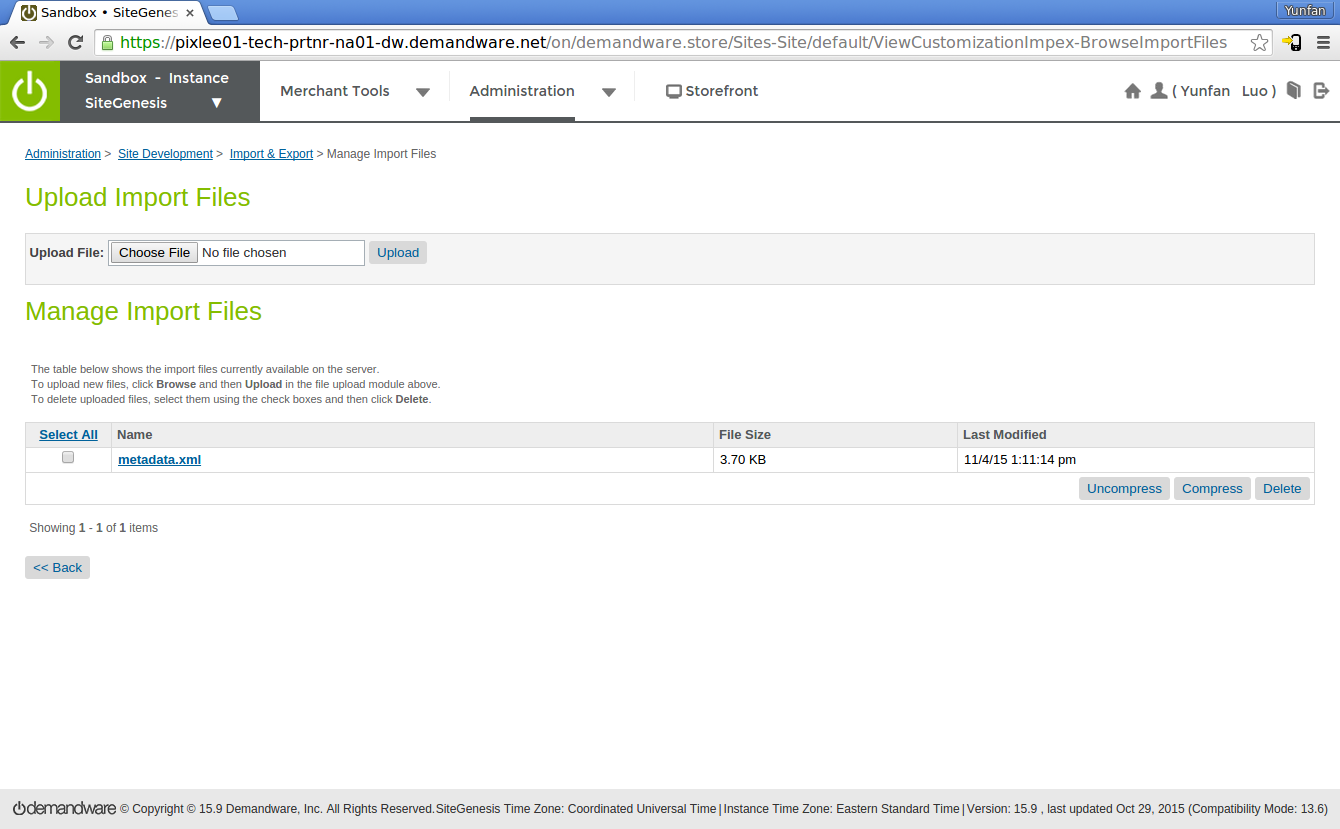
metadata.xml should now show up under Manage Import Files.
Upload Scheduled Jobs files
- Click the arrow next to Administration.
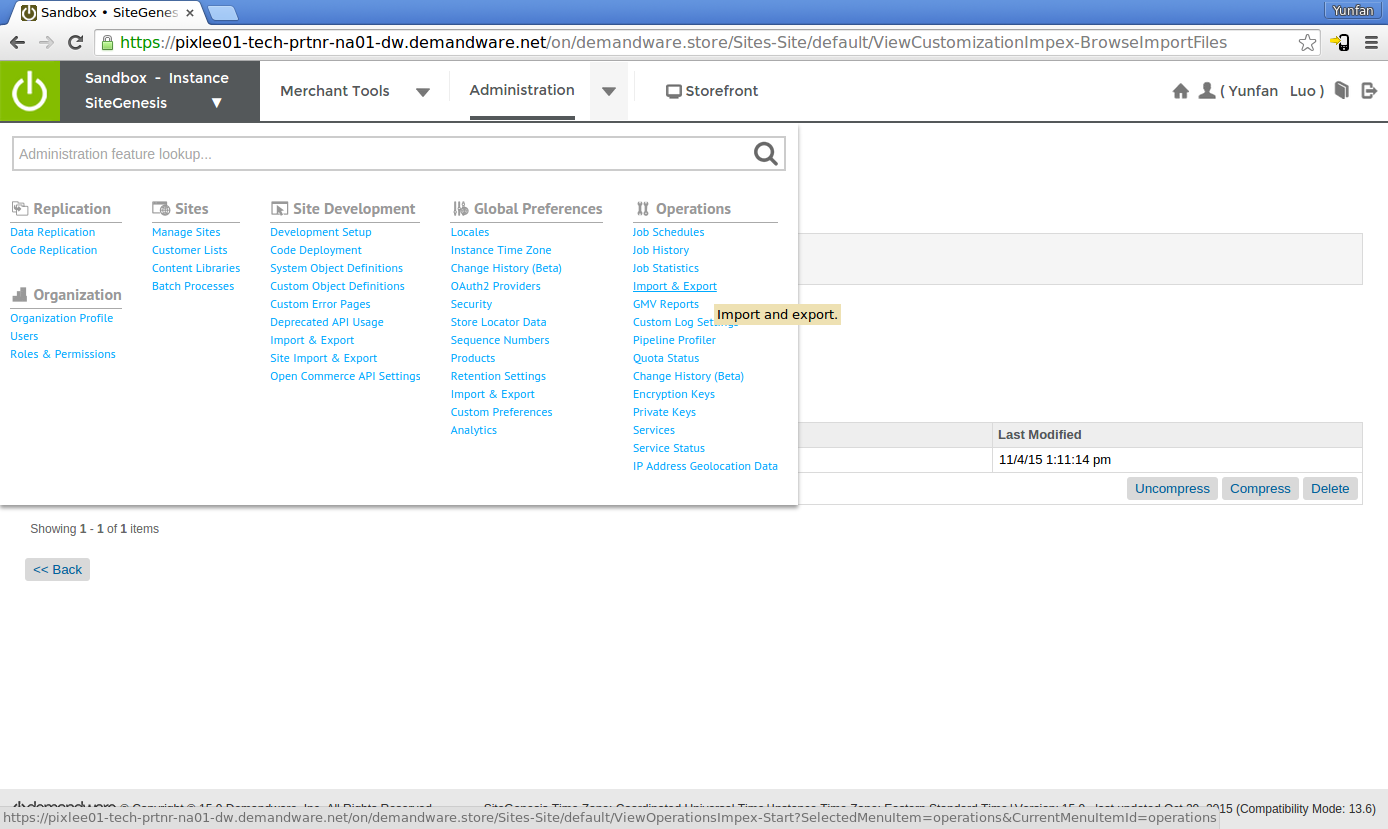
This time, click on the Import & Export button that is under Operations.
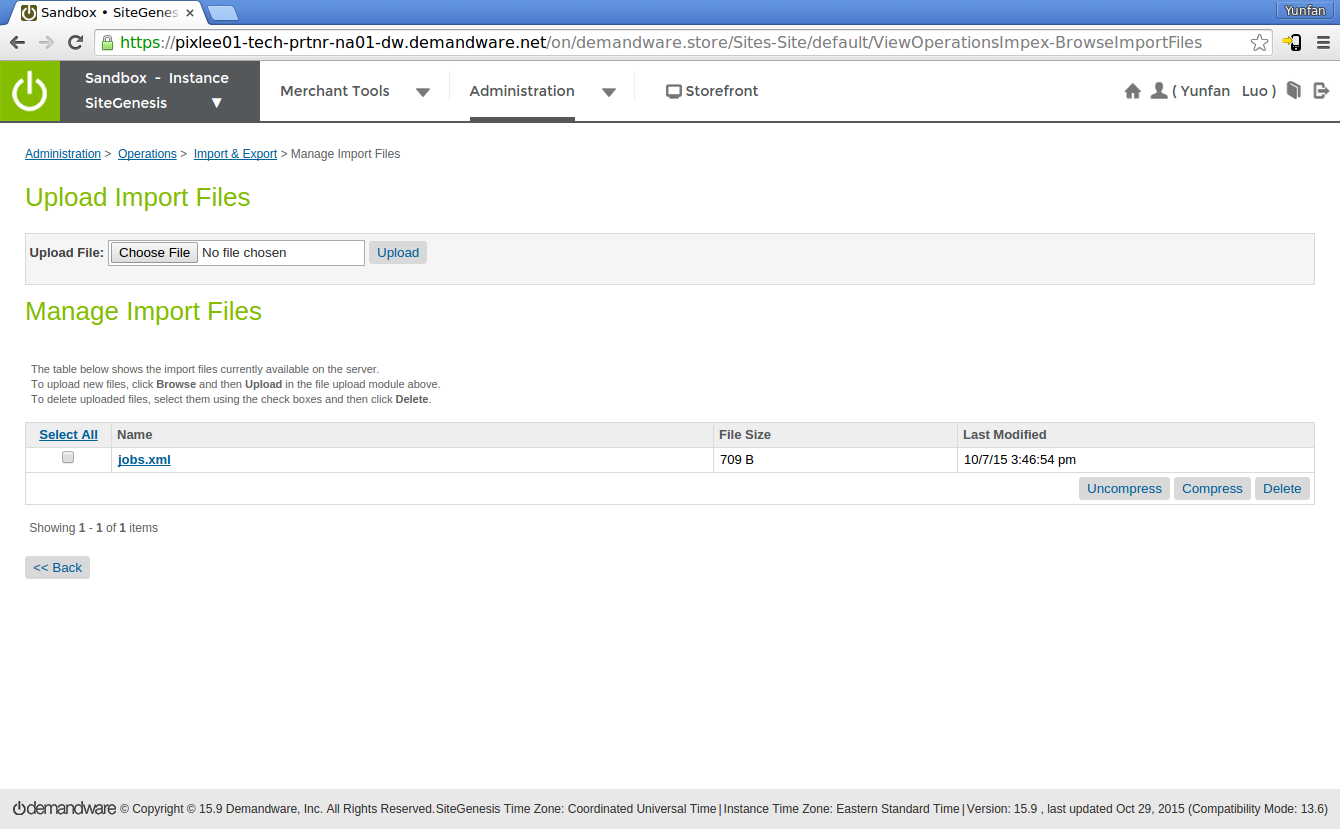
- Do the same thing here for jobs.xml that you did for metadata.xml.
Click on the Upload button.
Navigate to demandware-link_pixlee-16e7bb348295/metadata/jobs.xml.
Click on the Upload link to finish the upload.
Enable the Schedule Job
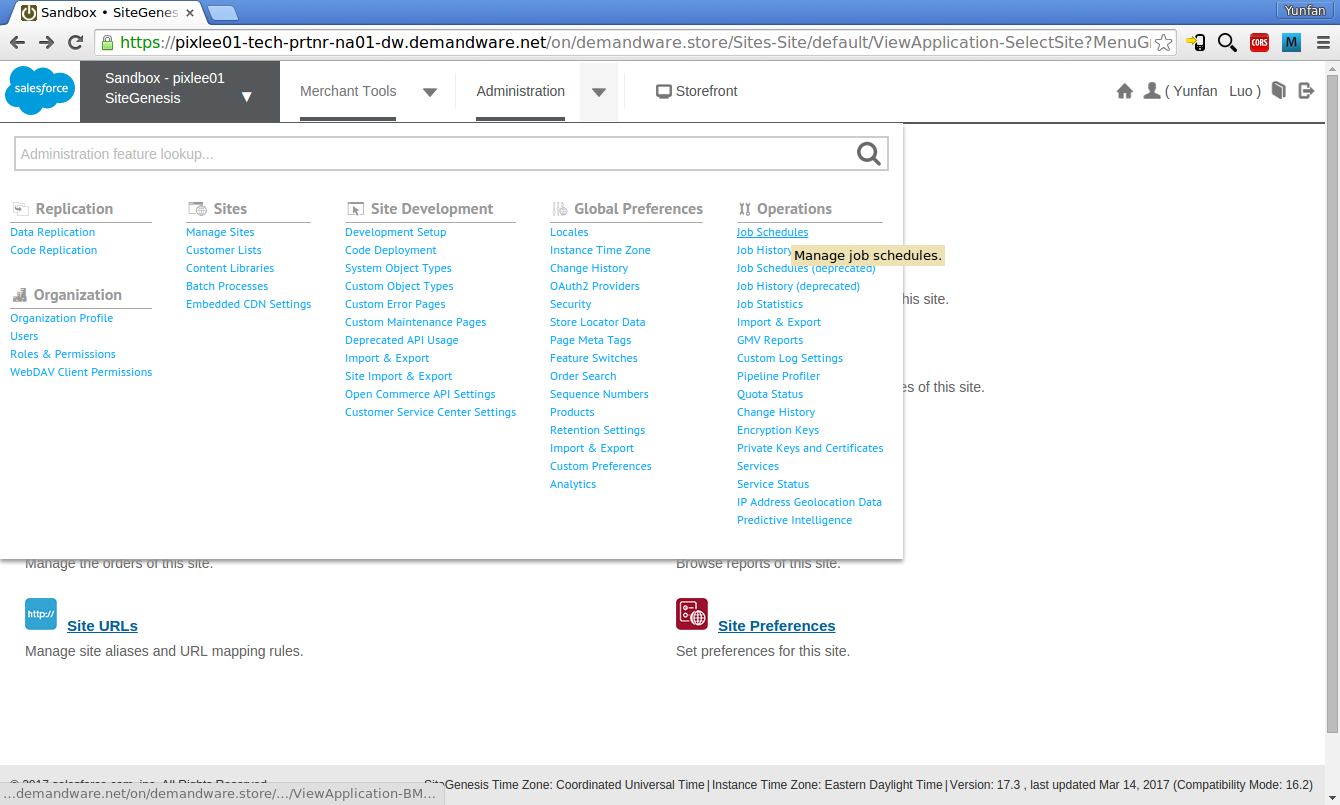
- Once again click the arrow next to Administration.
Click on Job Schedules under Operations (not Job Schedules (deprecated)).
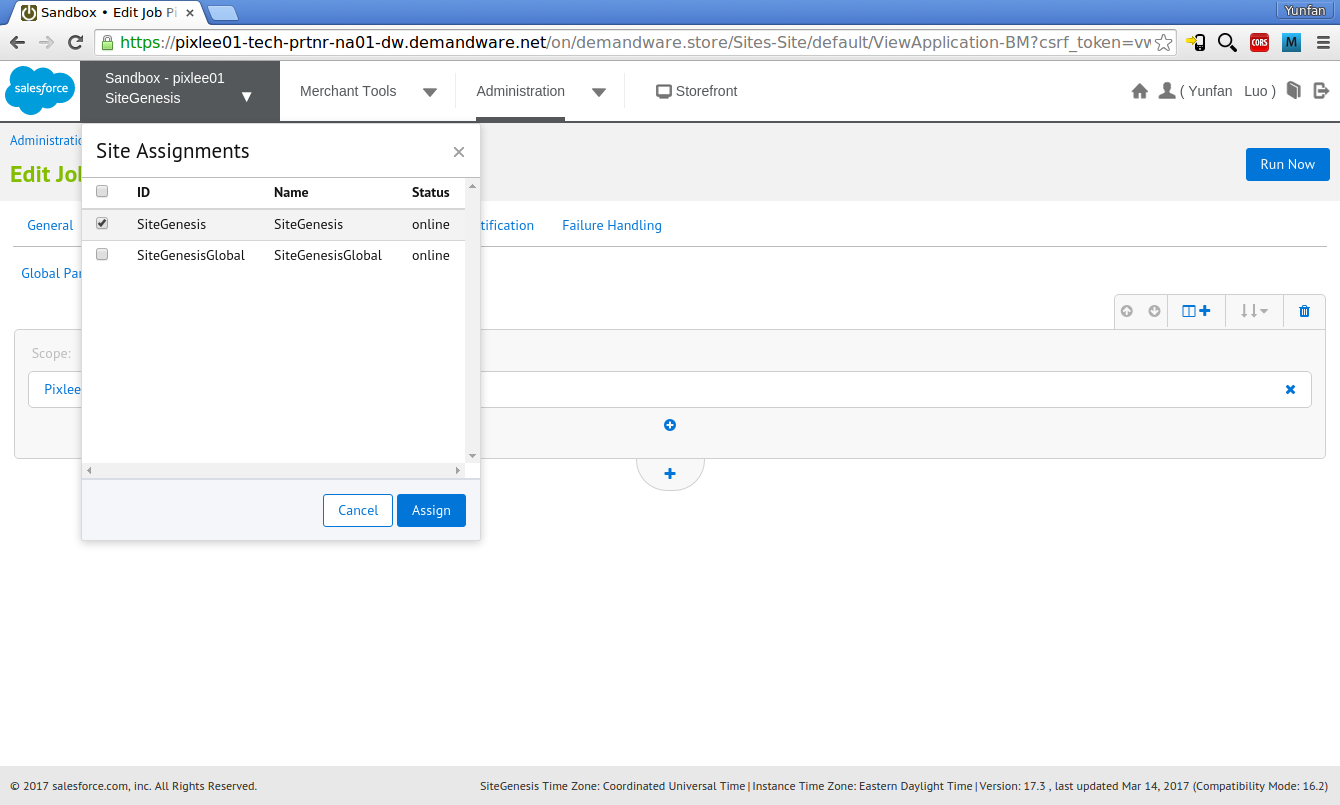
- Click on the Pixlee Product Export Job, and the Step Configurator tab after that.
Next to Scope click on what probably says Organization and check the checkbox next to any/all sites that you want the product export to run on.
Finally, click Assign.
Integrate Your SFCC Store with the Pixlee Cartridge
This part of the guide assumes you have Eclipse set up with the Demandware Plugin.
If you need help setting up your environment, refer to Demandware's Getting Started for developers
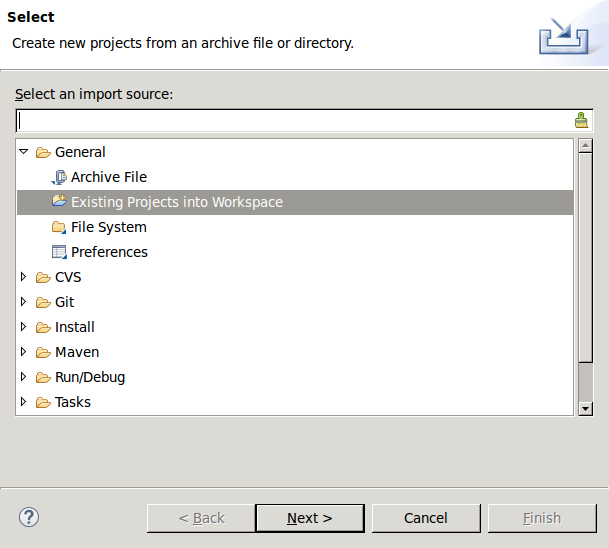
- In Eclipse, click on File > Import.
Expand the General folder if it isn't already, and choose Existing Projects into Workspace.
- Select root directory should already be selected.
Click on Browse... and navigate to the Pixlee_Demandware folder that you just extracted after step 11.
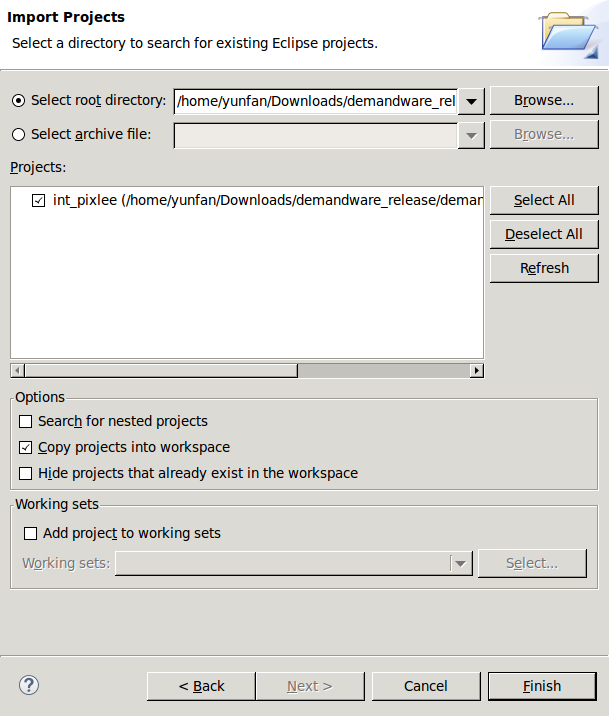
After clicking OK, int_pixlee should show up under Projects.
Check the checkbox if it isn't already, and click on Finish.
Configure Pixlee Custom Site Preferences
- Log into your SFCC Business Manager.
Click on the arrow next to Merchant Tools on the top navigation bar.
In the dropdown that appears, under Site Preferences click on Custom Preferences.
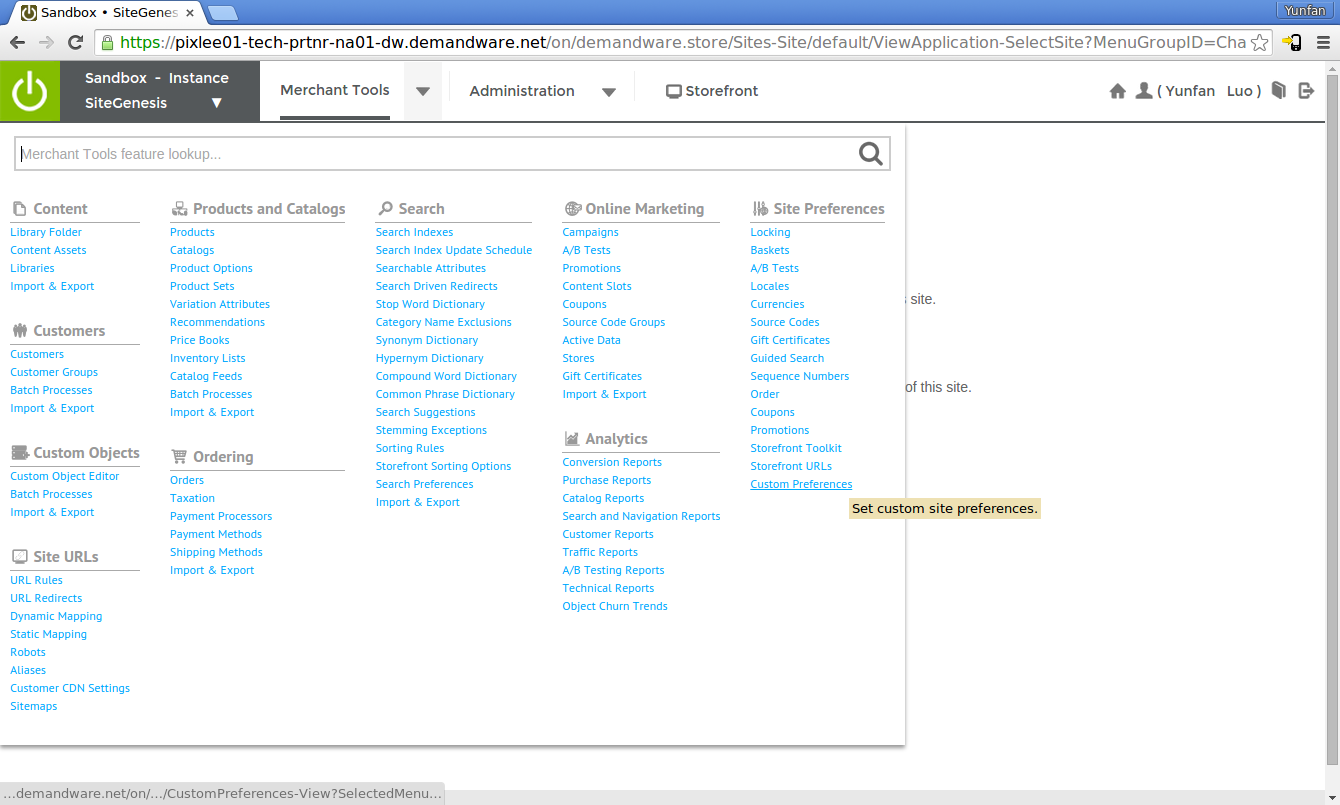
The resulting screen should look like the following:
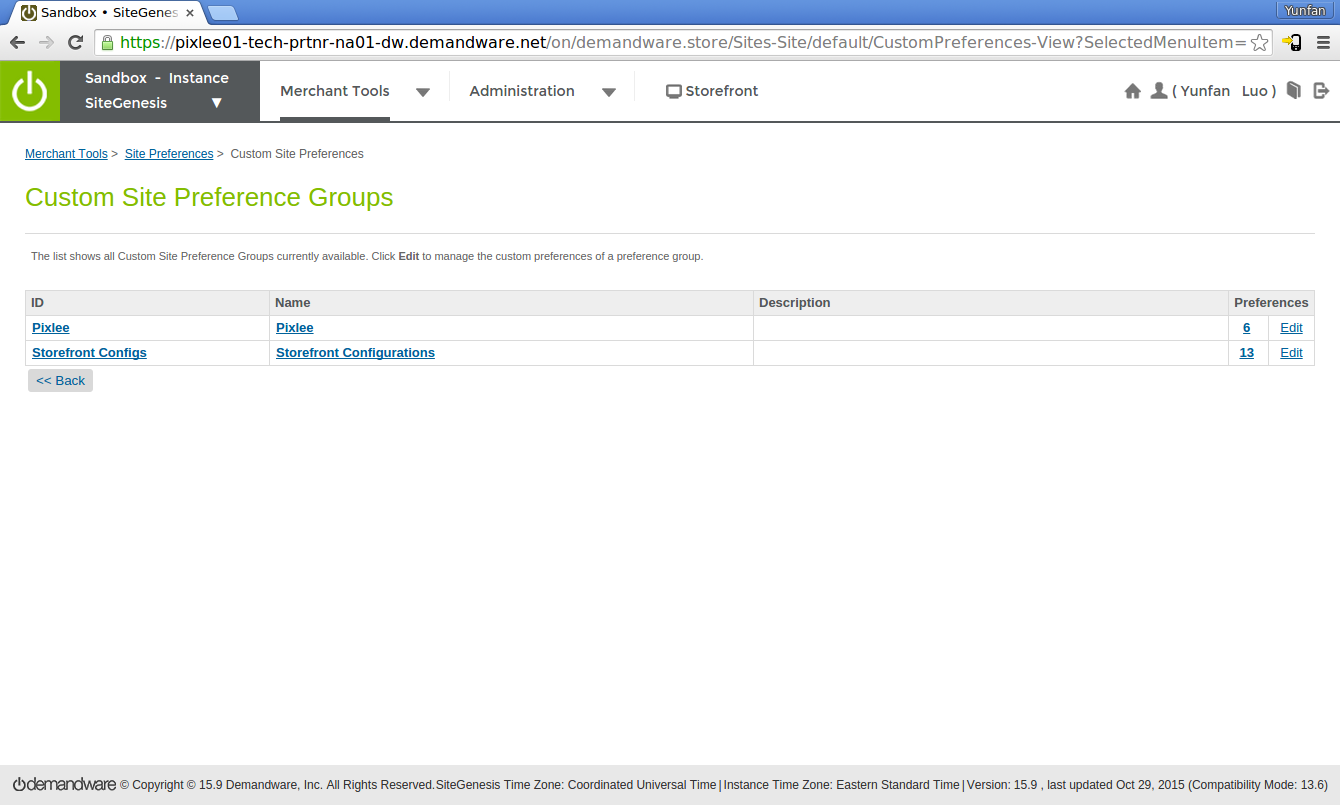
Click on Pixlee.
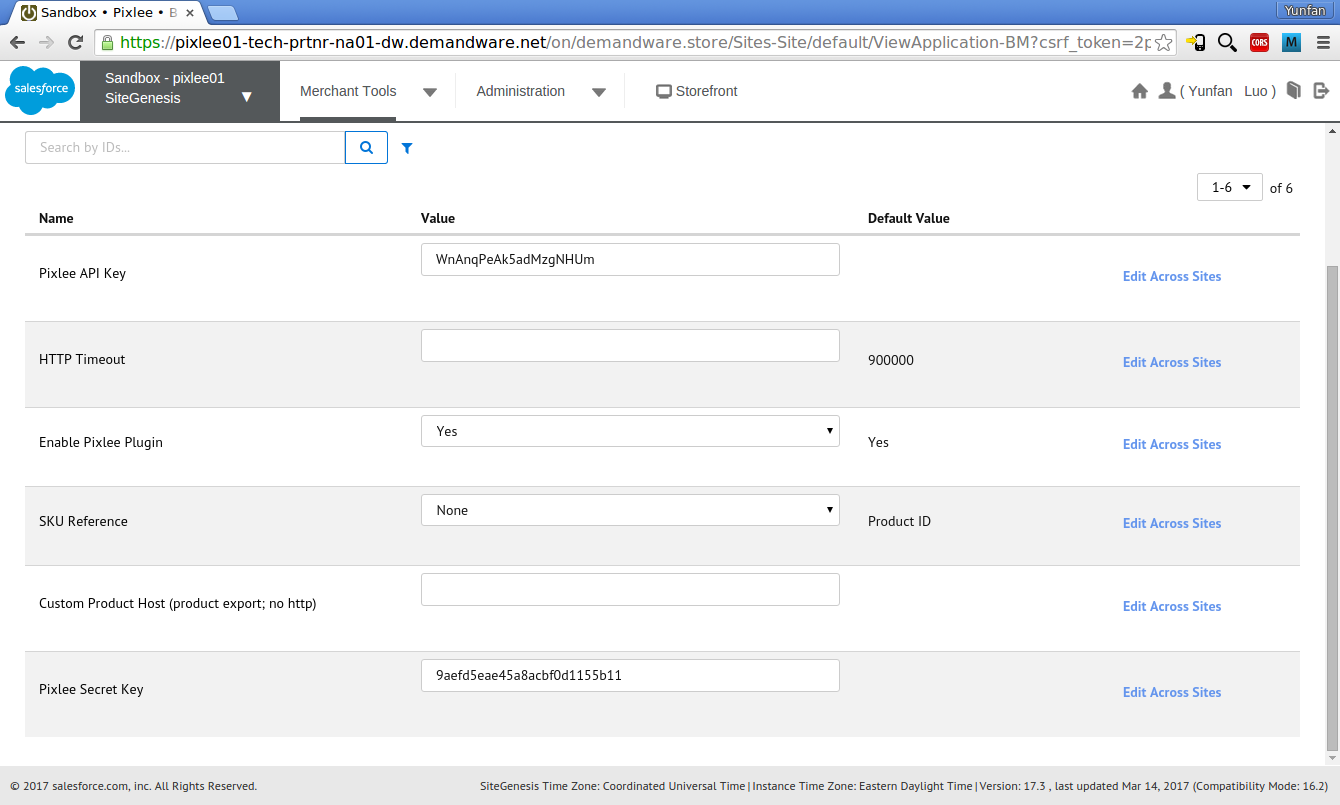
- Fill in the Pixlee API Key, Pixlee Private API Key, and Pixlee Secret Key fields. Using the values from step 2 of installation.
Make sure to check the Enable Pixlee Plugin checkbox.
Click Apply.
The filled out form should look like this.
Setting Up Analytics Events
Embed pixlee_events.js in the header
Add a snippet to the bottom of header.isml
/cartridge/templates/default/components/header/header.isml
<iscomment>Pixlee Embedded JS</iscomment>
<isinclude template="utils/pixleeevents"/>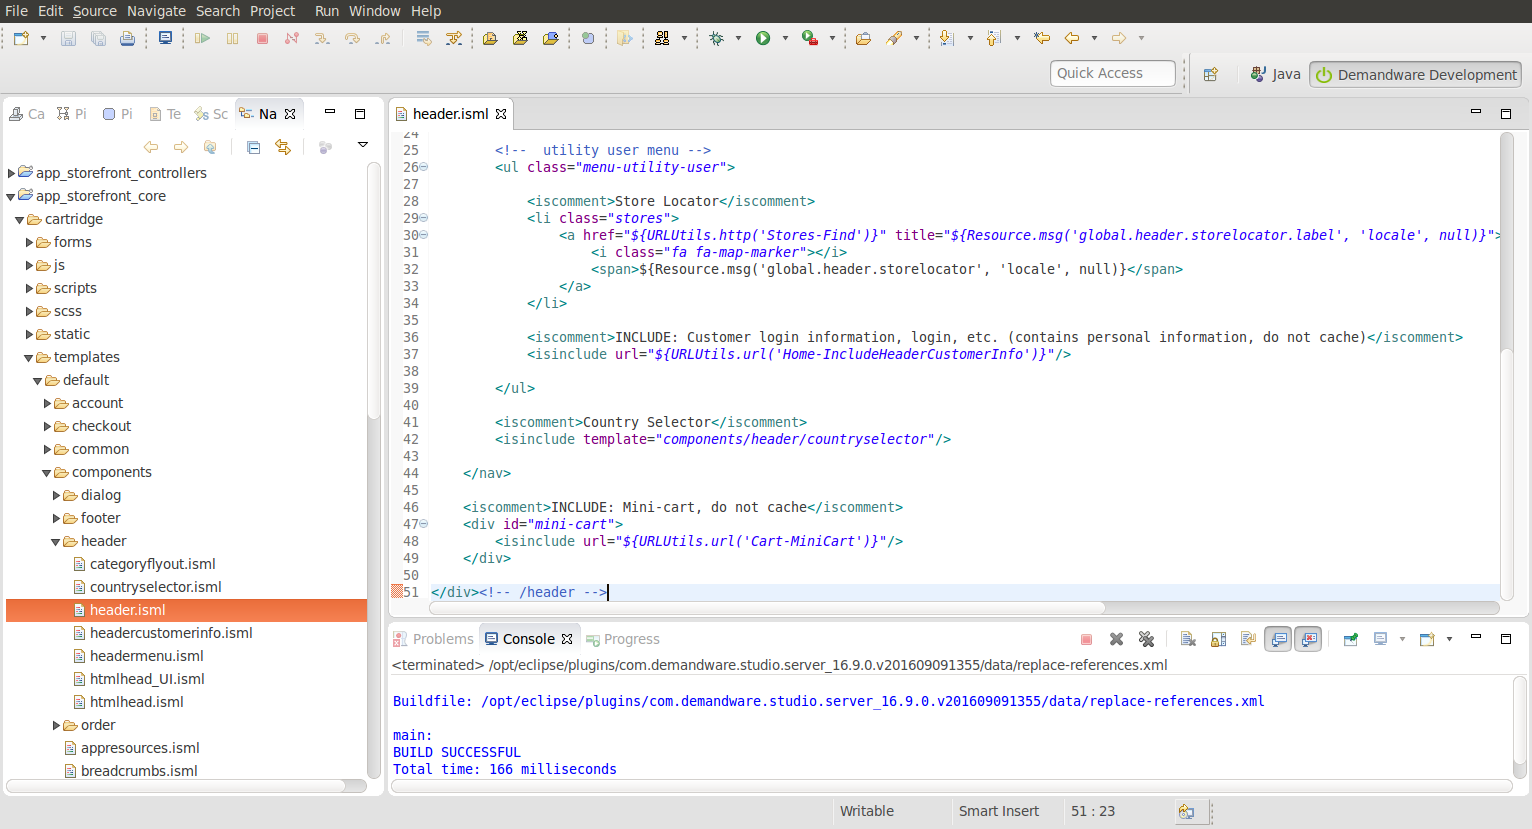
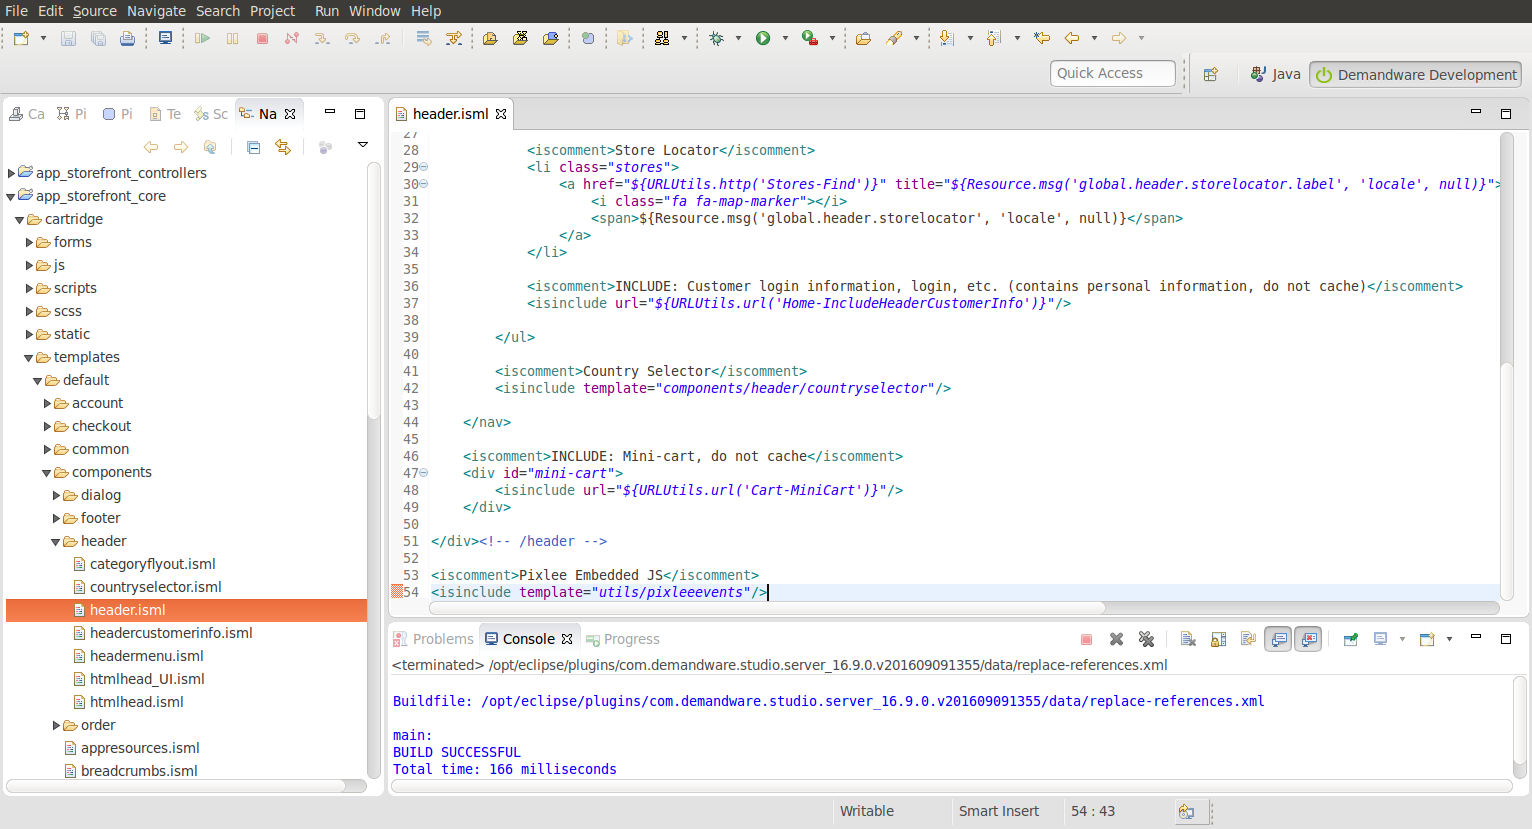
Save the file.
Embed Add to Cart and Conversion hooks
In Eclipse, switch to the Navigator view on the lefthand bar.
After expanding your storefront cartridge, navigate to the following file.
/cartridge/templates/default/checkout/cart/minicart.isml
Add the following snippet to the bottom of the page.
<iscomment>Pixlee Add To Cart Analytics</iscomment>
<isif condition="${pdict.CurrentHttpParameterMap.cartAction == 'add' || pdict.CurrentHttpParameterMap.cartAction == 'update'}">
<isinclude template="checkout/addtocart"/>
</isif>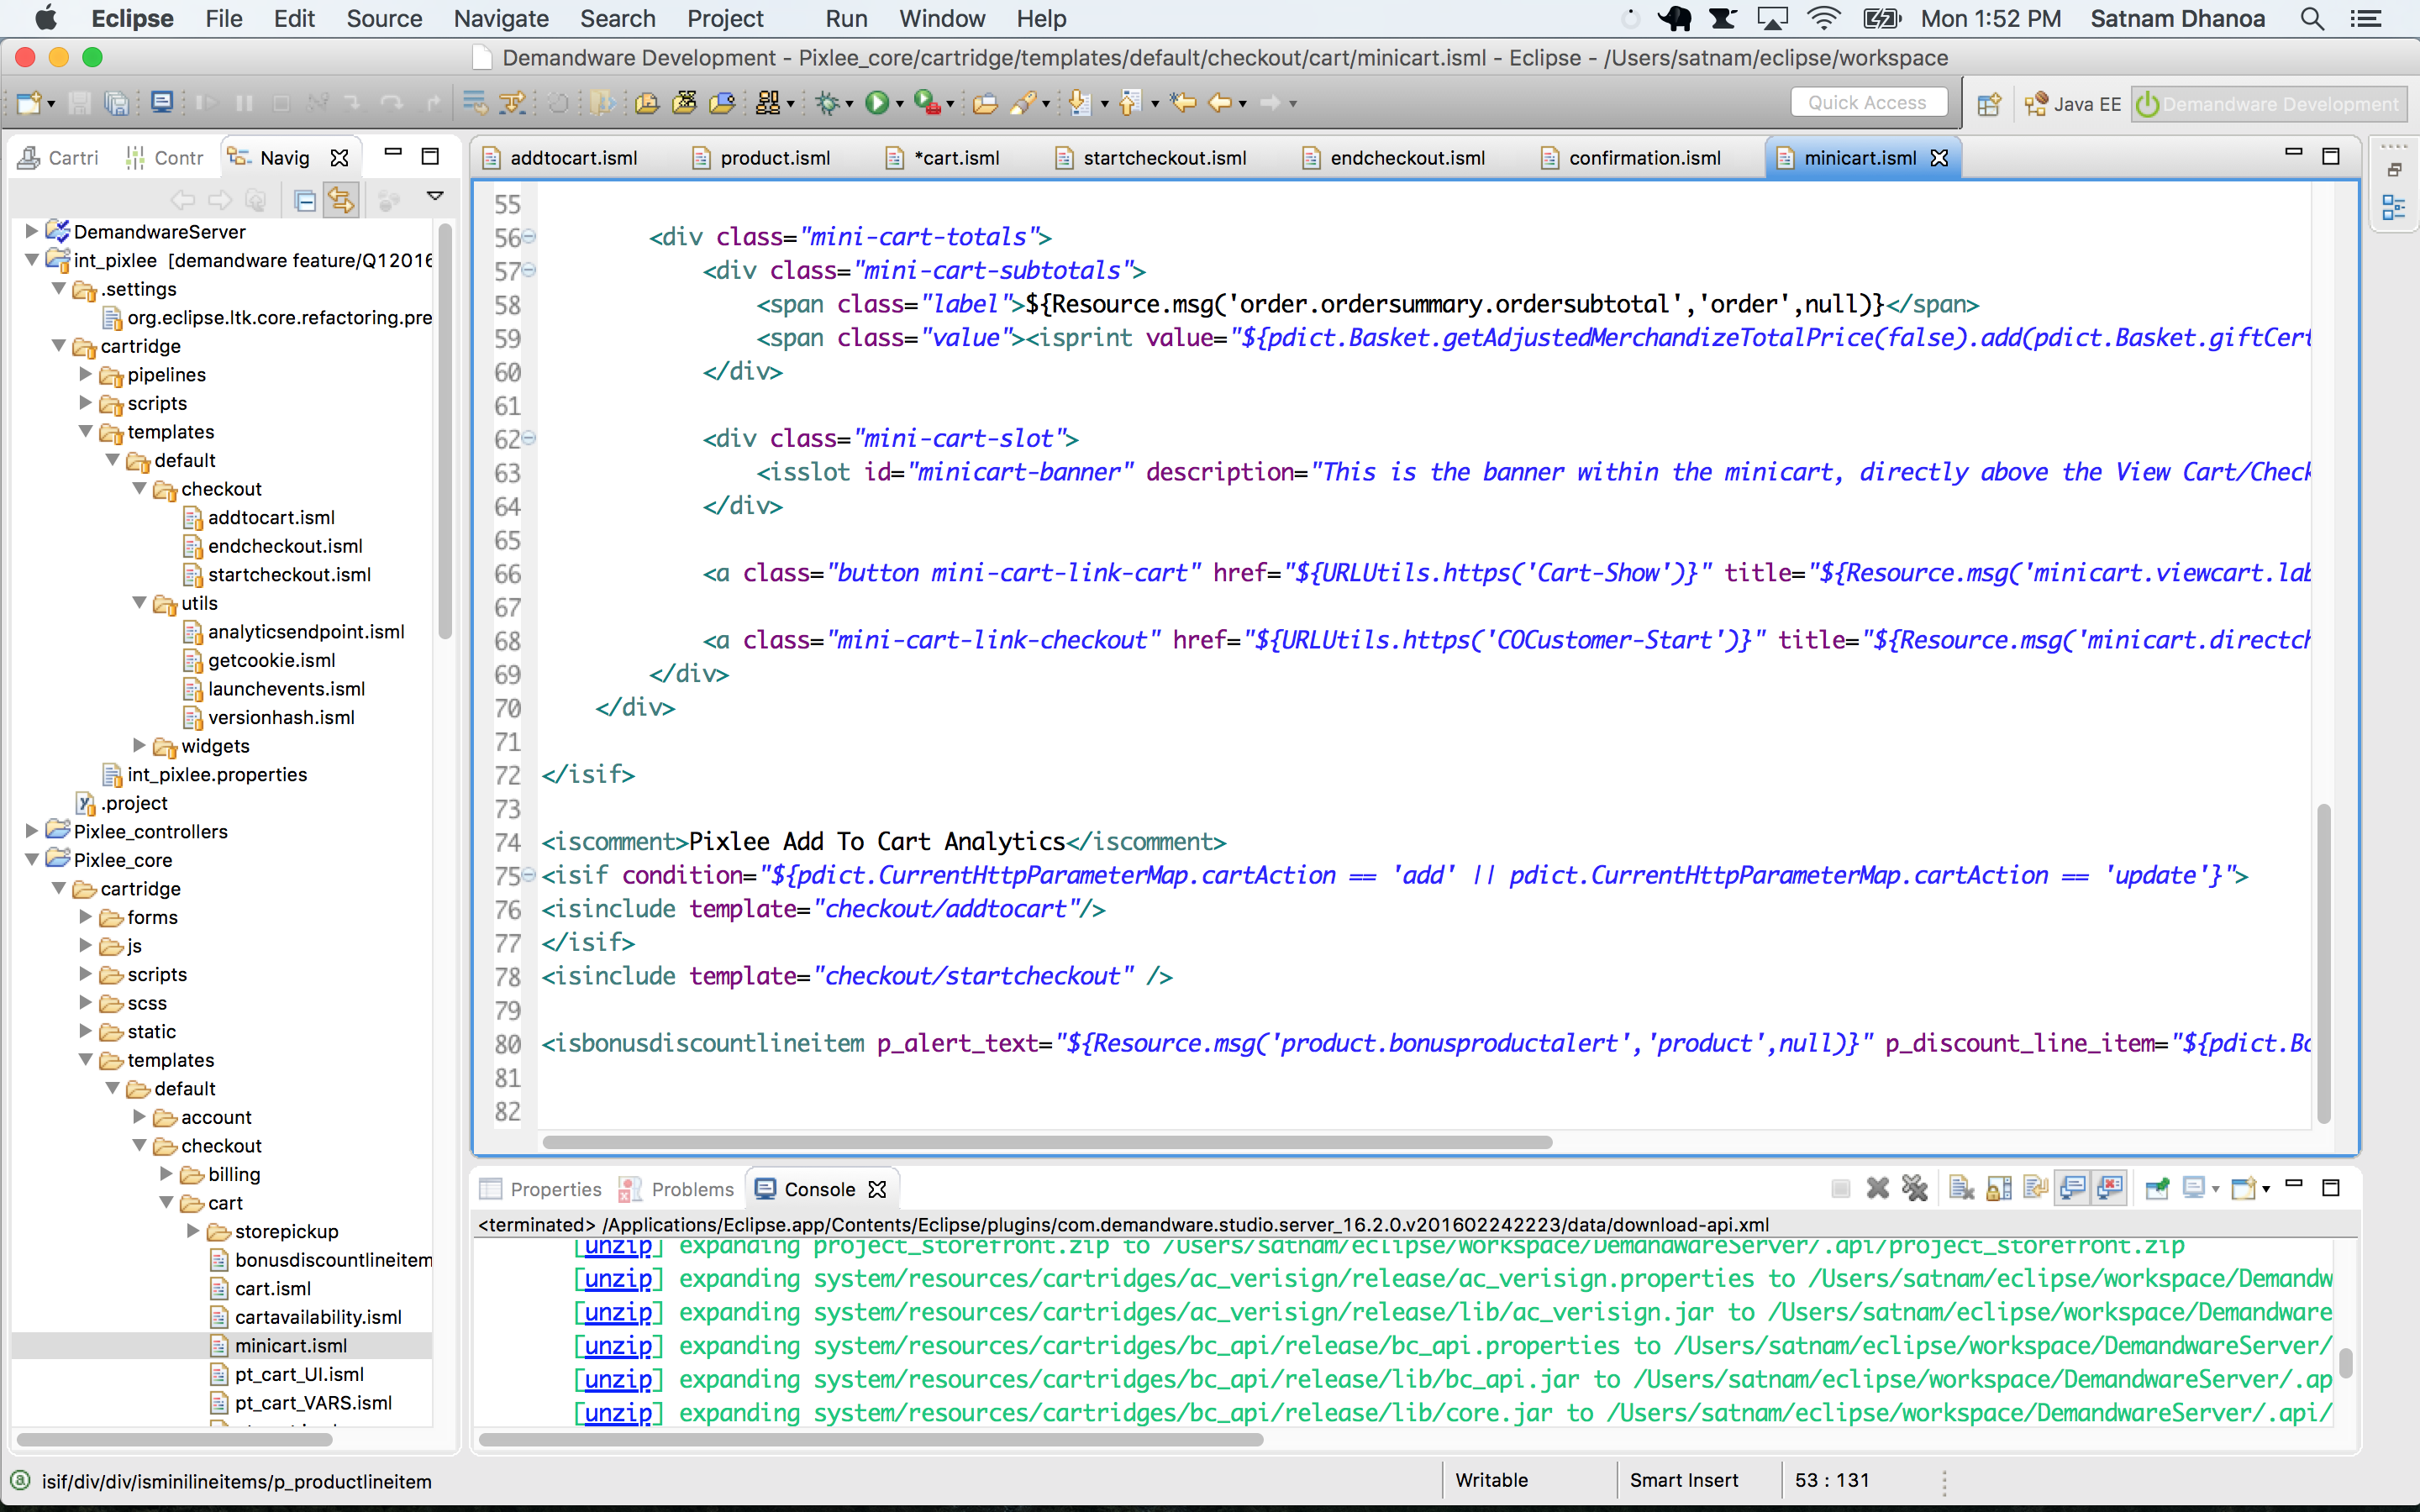
Save the file.
- Navigate to /cartridge/templates/default/checkout/confirmation/confirmation.isml
Add the following snippet at the bottom of the page.
<iscomment>Pixlee End Checkout Analytics</iscomment>

<isinclude template="checkout/endcheckout"/>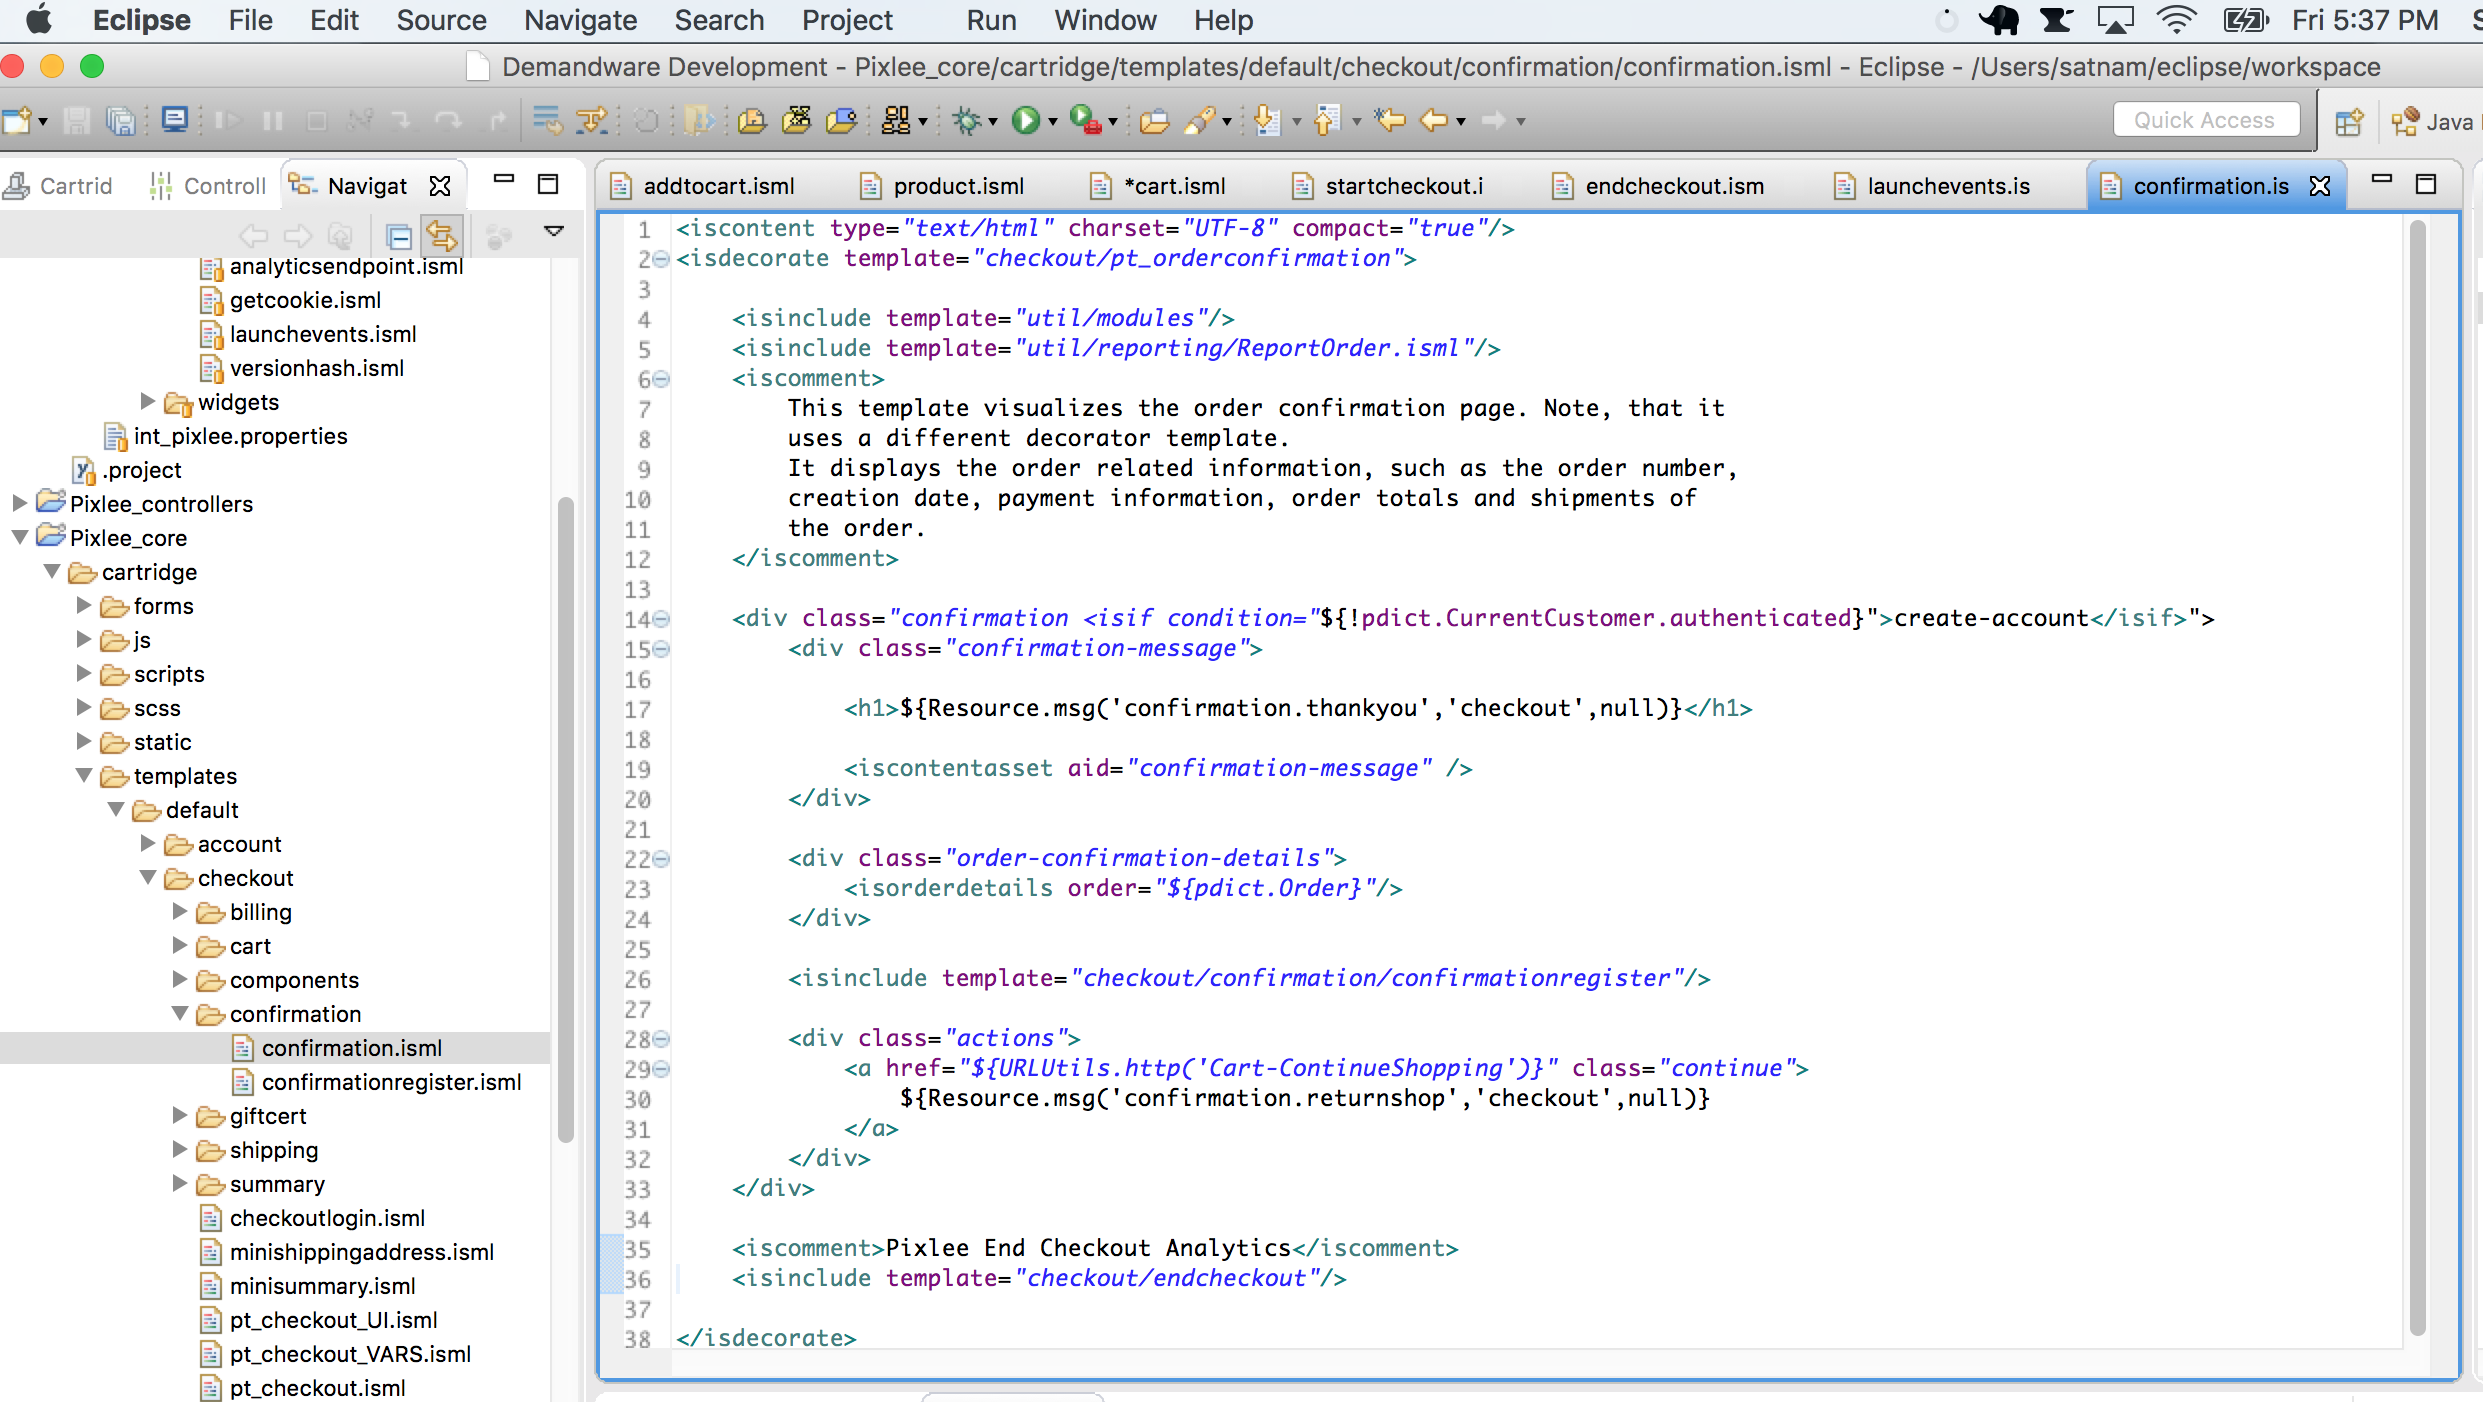
Embedding Widgets
Embed PDP Widget in Product Pages
- The product detail page is a little more involved.
For productdetail.isml we'll need to paste the code snippet on the line immediately after:
</div><!--/pdpMain -->Similarly, navigate to the following:
/cartridge/templates/default/product/productdetail.isml
And paste the following:
<iscomment>Pixlee PDP</iscomment>
<isinclude template="widgets/pdpwidget.isml"/>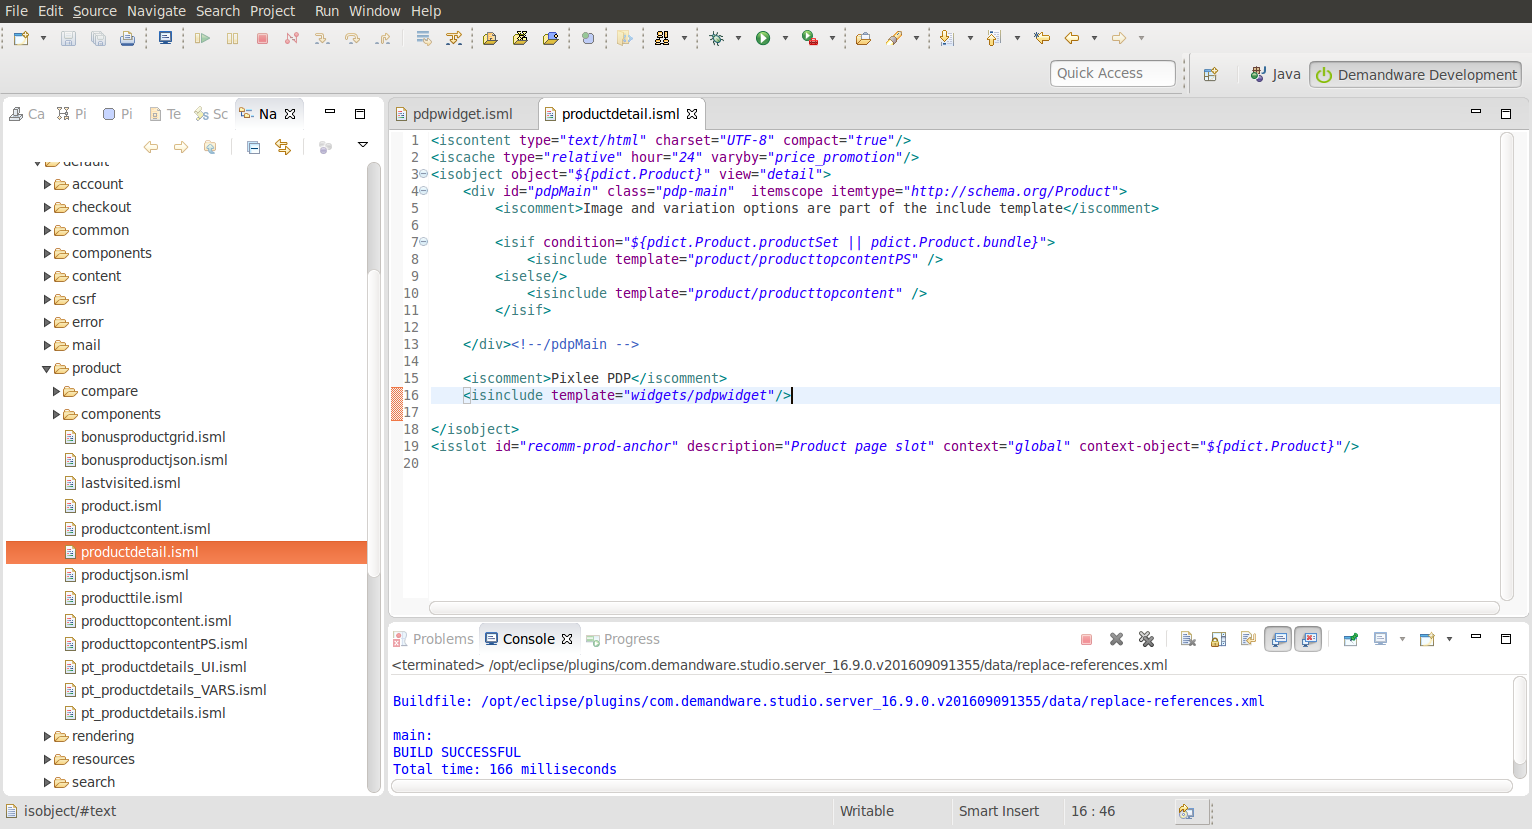
Save the file.
- Edit the Pixlee cartridge's pdpwidget.isml and include the value of account ID and widget ID from earlier steps.
Navigate to the following:
int_pixlee/cartridge/templates/default/widgets/pdpwidget.isml
It should look like this:
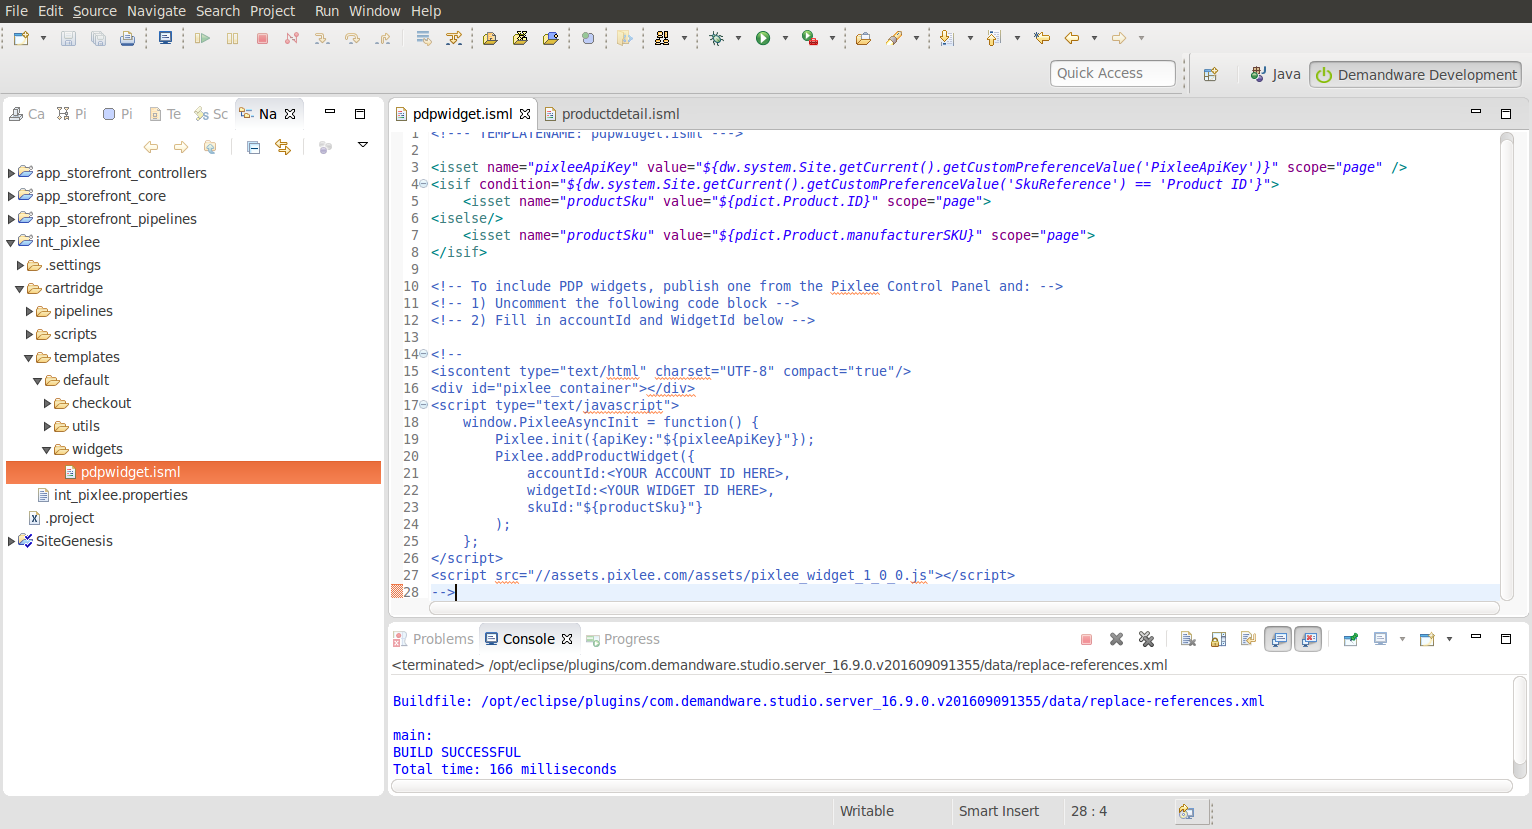
Uncomment the commented block, and replace < YOUR ACCOUNT ID HERE > with the account ID that you recorded in Step 2 of Get Your Pixlee API Keys section.
Also replace the < YOUR WIDGET ID HERE > with actual values from Step 4 of the Get Pixlee Product and Category Page Widget IDs section.
For example, something like the following:
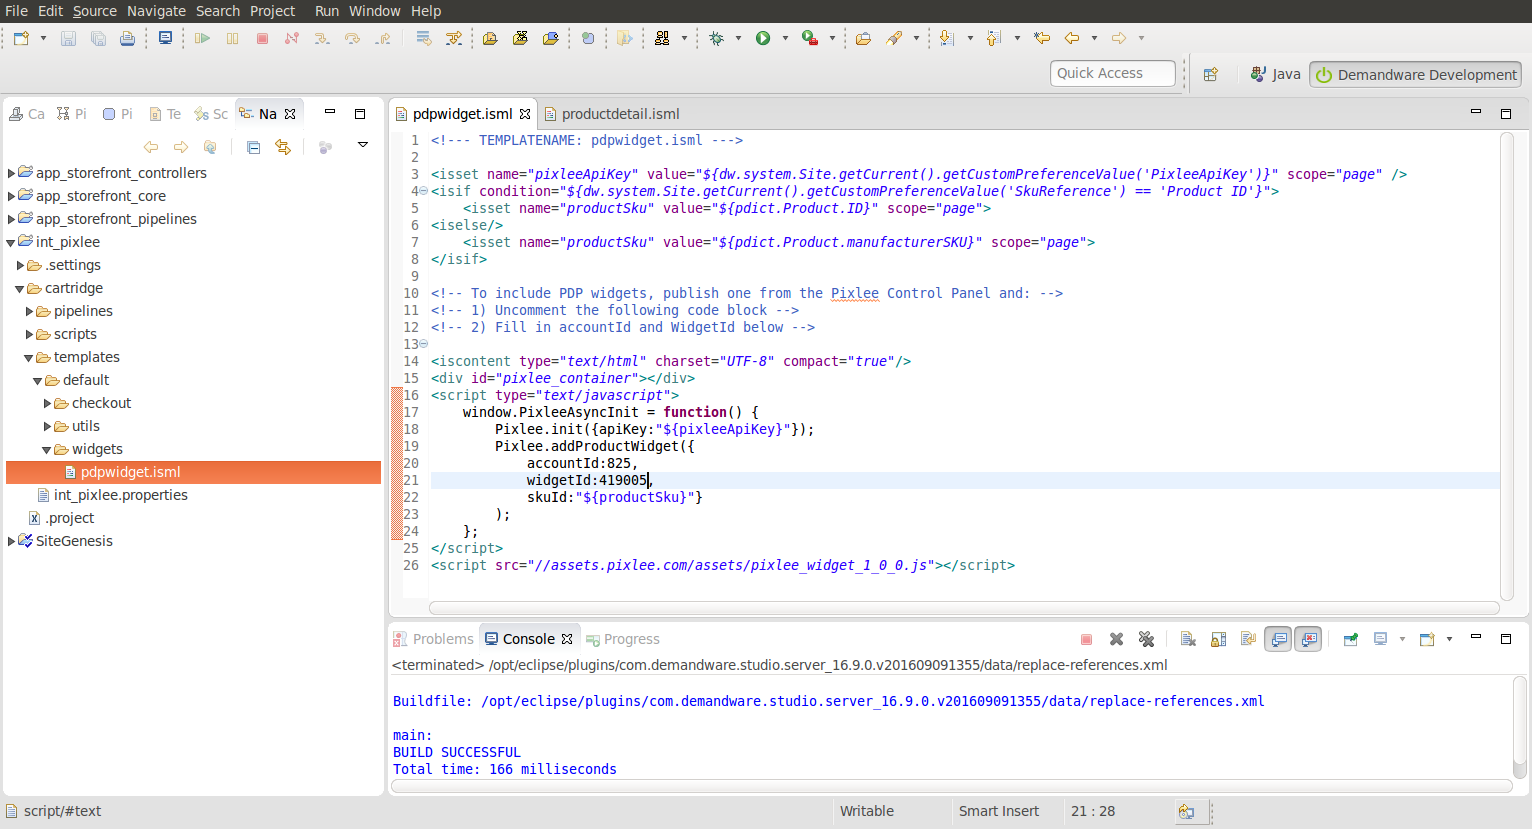
Save the file.
Embed CDP Widget on Category Pages
-
To embed category widgets on all category pages. Paste the following code on catlanding.isml, according to where you want the widget to appear.
<iscomment>Pixlee CDP</iscomment>
<isinclude template="widgets/cdpwidget.isml"/>
For example, you could add the widget at the bottom of the page by doing to following
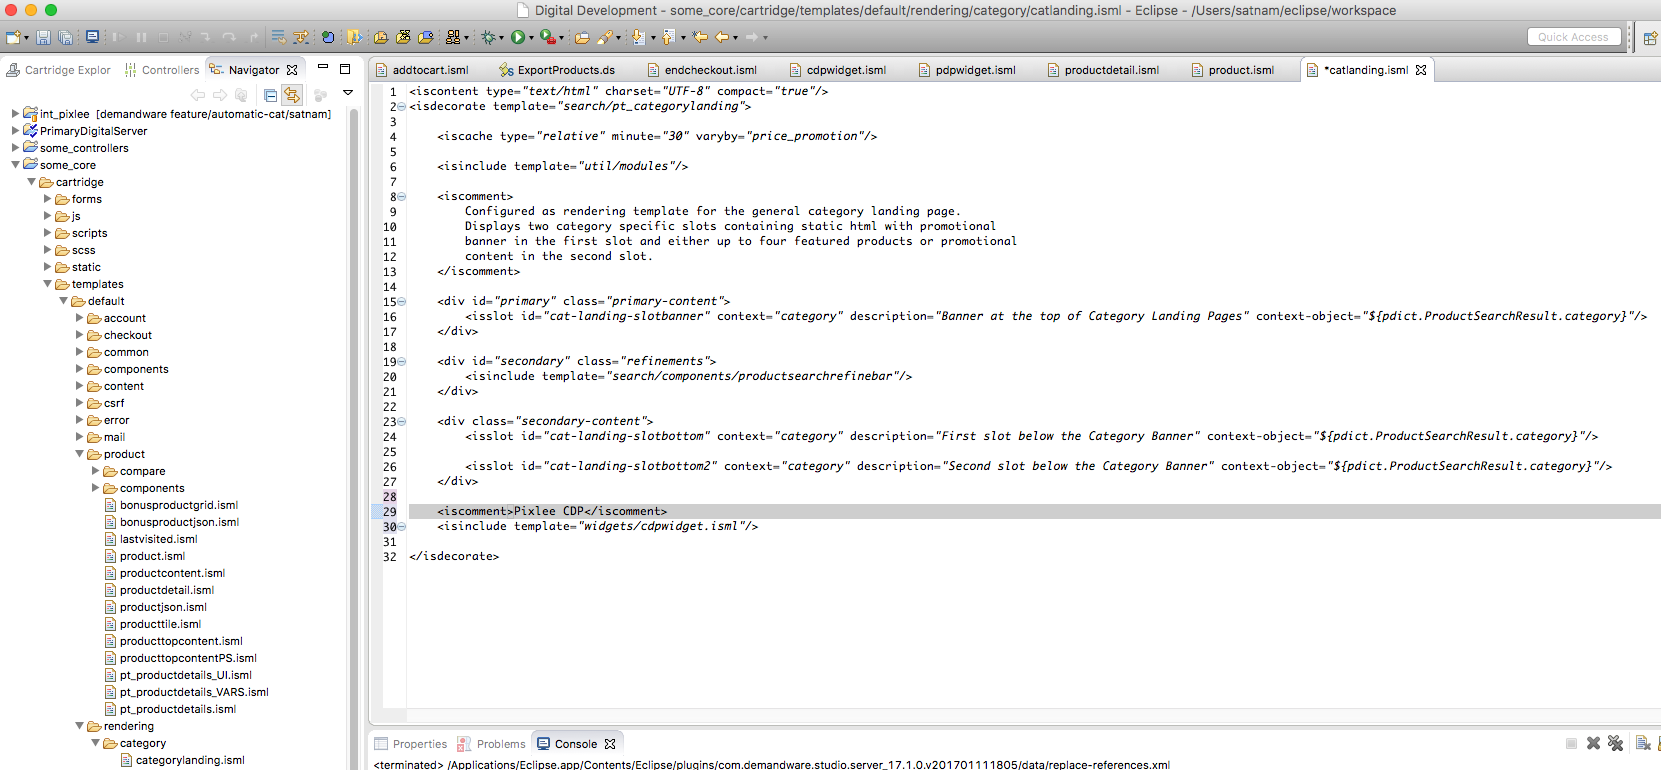
Save the file.
- Edit the Pixlee cartridge's cdpwidget.isml and include the value of account ID and widget ID from earlier steps.
Navigate to the following:
int_pixlee/cartridge/templates/default/widgets/cdpwidget.isml
Uncomment the commented block, and replace < YOUR ACCOUNT ID HERE > with the account ID that you recorded in Step 2 of Get Your Pixlee API Keys section.
Also replace the < YOUR WIDGET ID HERE > with actual values from Step 4 of the Get Pixlee Product and Category Page Widget IDs section.
For example, it should look like this
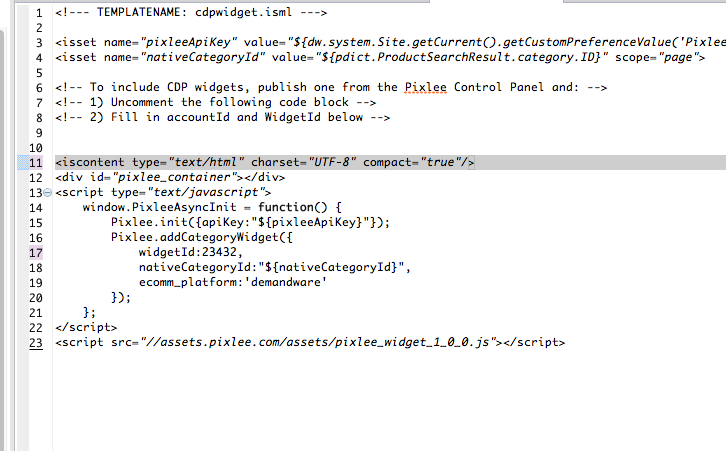
Save the file.
Updating the Cartridge
The SFCC cartridge has been updated to support both SFRA and SiteGenesis. It is recommended to upgrade to the latest version of the cartridge rather than updating the deprecated cartridge. See Salesforce Commerce Cloud - SFRA & SiteGenesis
Pixlee is constantly pushing updates to its SFCC cartridge to include new feature and bug fixes. Simply follow these steps to update to the latest version.
-
Download the latest version of the cartridge.
-
Unzip the contents of the package and it should contain a directory called
int_pixlee. -
Copy the
ExportProducts.dsfile fromUnzipped_location/int_pixlee/cartridge/scripts/jobs/ExportProducts.ds. -
Open Eclipse. All we need to do is replace the existing
ExportProducts.dslocated insideYour_Server_Root/int_pixlee/cartridge/scripts/jobs/with the one that we copied in the previous step. -
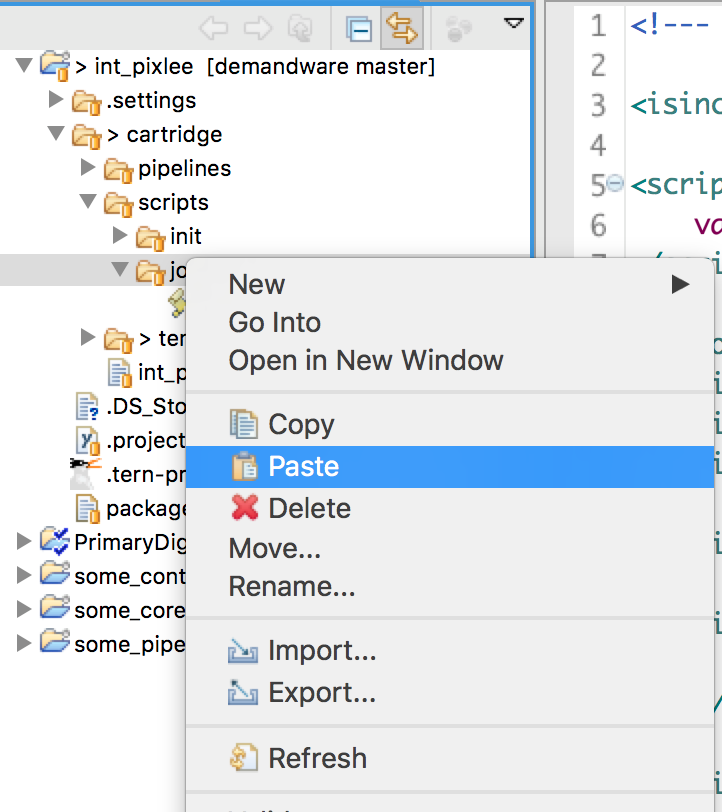
Expand the Navigation menu like so.
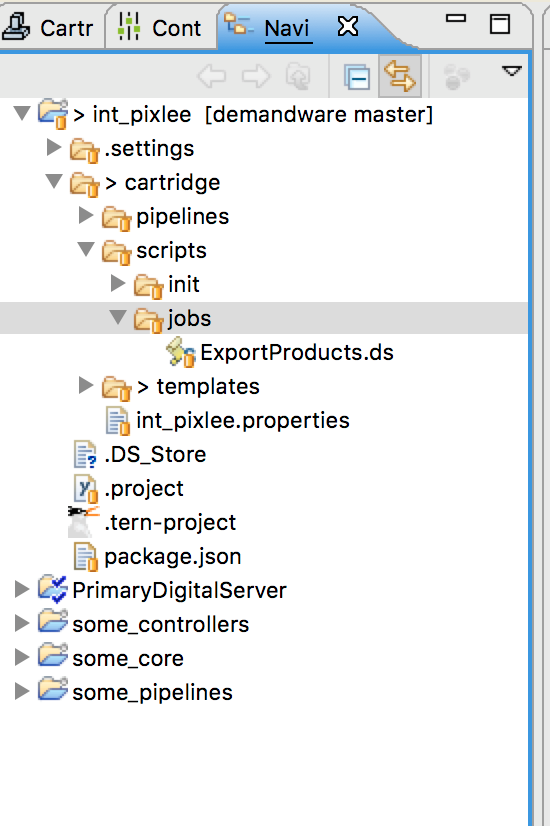
- Paste the copied file into the
jobsfolder. Eclipse will prompt you if you want to replace the existing file, press YES.
- Ensure that this change goes to production and you're all done!.
Testing and Troubleshooting commmon issues
To test that everything was implemented correctly, we need to check two things -
- Were all the products exported?
- Are API calls being successfully made to the Pixlee API?
Were all the products exported?
Before testing, please make sure that the Pixlee Product Exports job has at least ran once. If you've already run the exports once, skip to step 3.
- In order to run it manually. Open Business Manager. Under Administration tab click Job Schedules link under the Operations section.
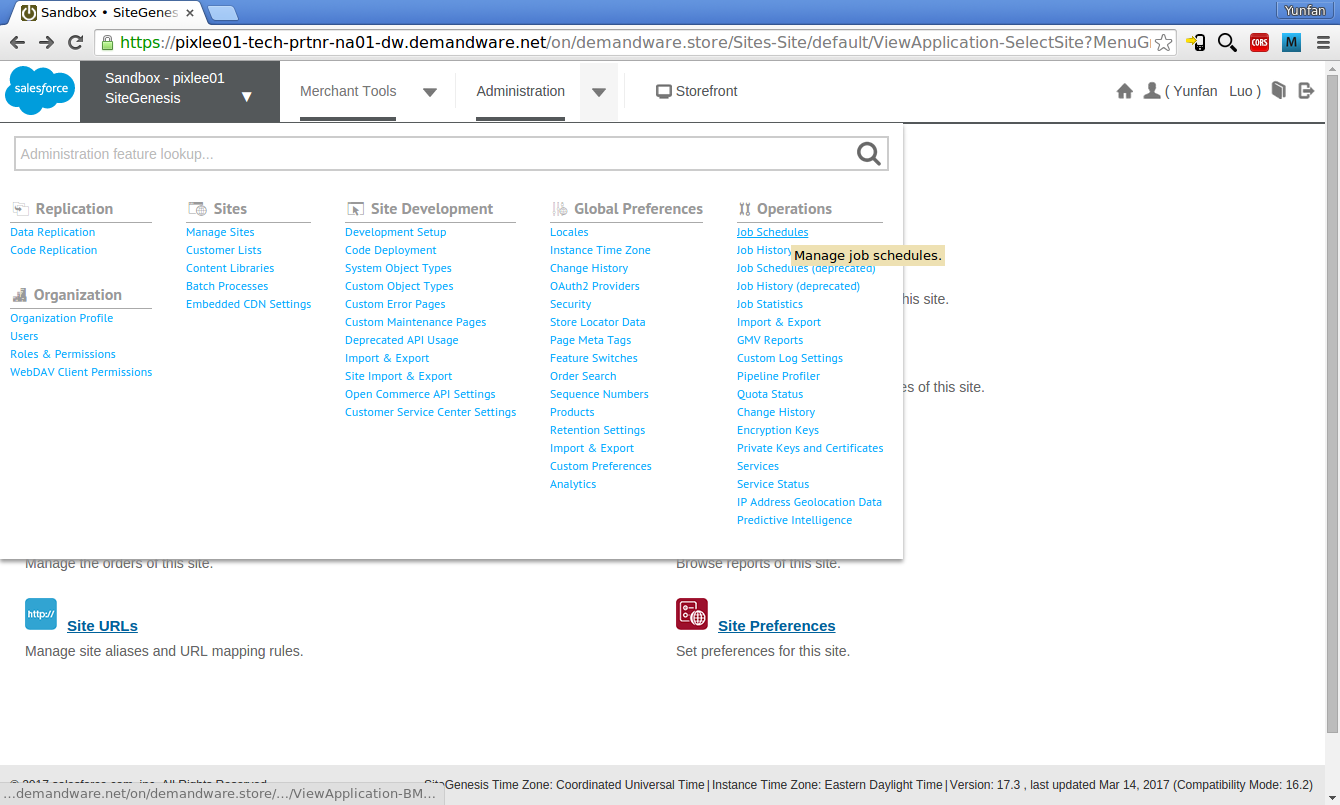
-
Check the checkbox next to Pixlee Product Exports and click Run.
-
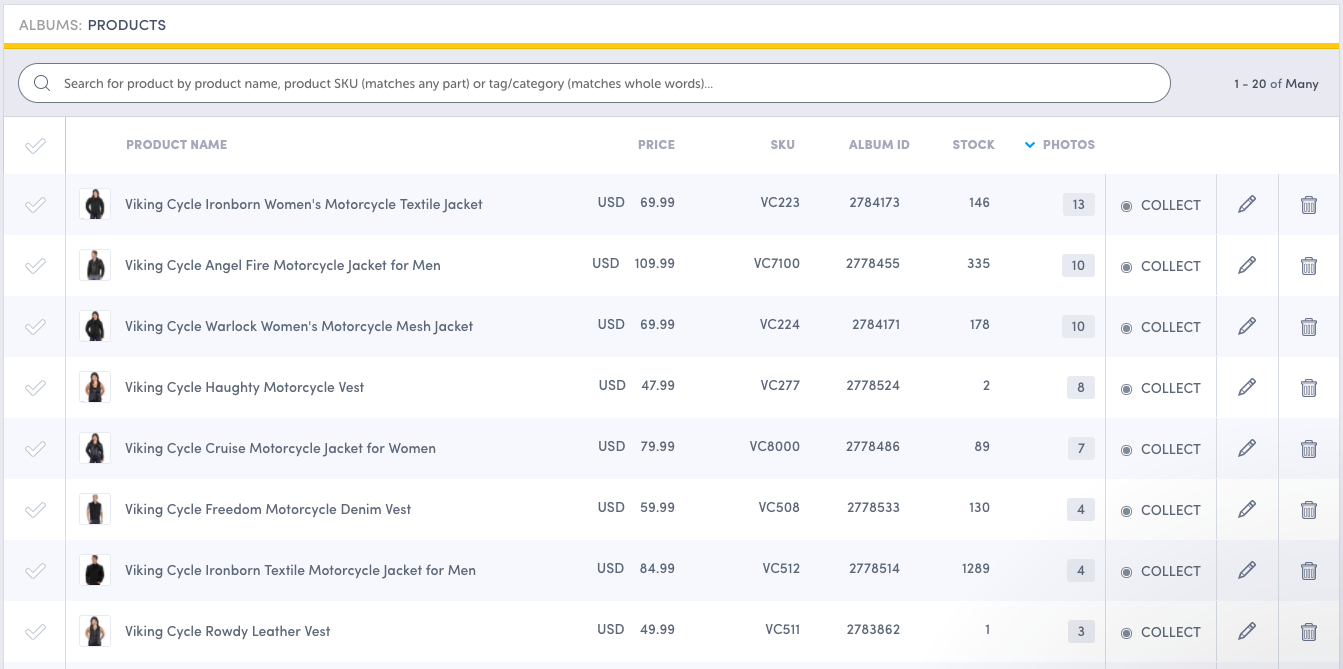
Log in to Pixlee and navigate to Products under the Album tab. Alternatively, click this link..
-
You should see a list of products on this page.
-
Try searching for a few products on this page that you know exist in your catalog.
-
In case the list is empty or you were not able to search for a particular product, proceed to the next step. Otherwise, proceed straight to the next section i.e. Are API calls being successfully made to the Pixlee API?
-
There can be several causes of failure to export products so first, we need to find out the exact cause of the failure. The Pixlee Product Exports job logs all exceptions and errors to the server logs. So the next step for us is to get the logs.
-
Open Business Manager. Under Administration tab click Job Schedules link under the Operations section. Click the Pixlee Product Exports link.
-
Click Schedule and History tab and History you'll find a summary of all the processes that ran recently.

- Click the link to download the log file. Contact Emplifi support and attach the log file with the request.
Are API calls being successfully made to the Pixlee API?
API calls are made to Pixlee API when a customer adds something to their cart and when they buy something on your store. We need to make sure that these calls are being made at the right time.
We recommend using Google Chrome for the next steps. But feel to apply the same steps to any other browser of your choice.
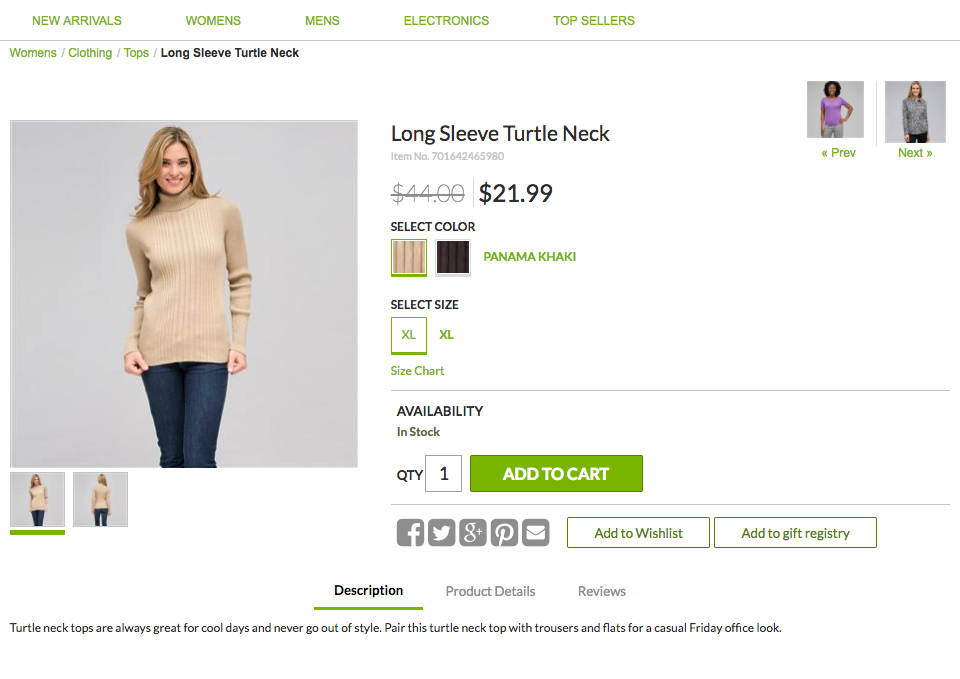
- Open a product page of your store.
- Open Chrome Developer Tools - Right click on the page anywhere and click Inspect. Alternatively, use keyboard shortcut CMD + OPTION + I ( CTRL + SHIFT + I for Windows). On the resulting menu, click the Network tab.
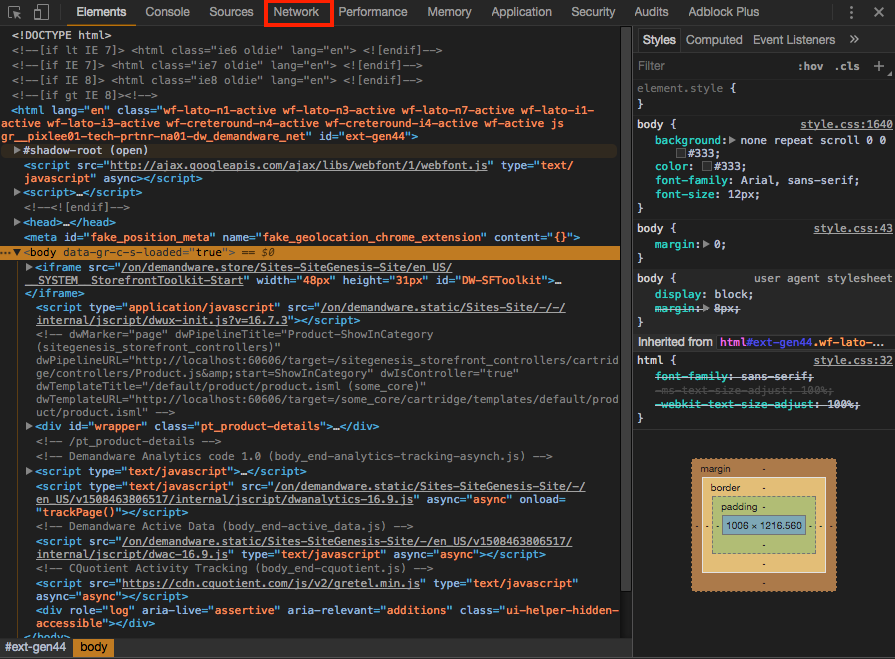
- Ensure that Preserve log checkbox is checked before proceeding.
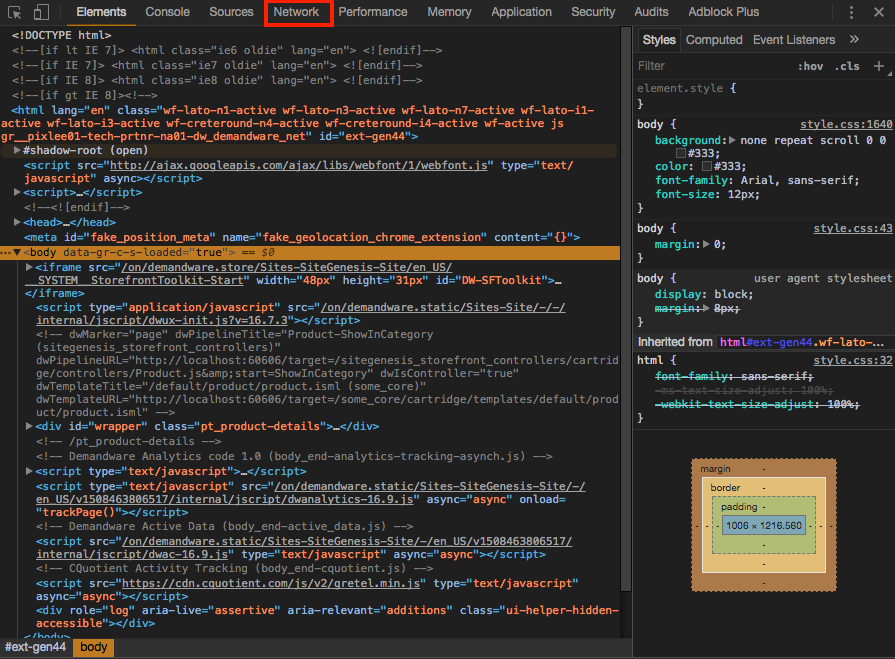
-
While keeping the Chrome Developers Tools open, switch to the product page and click Add to Cart on the product page.
-
After the product has been added to cart, switch to Chrome Developers Tools again.
-
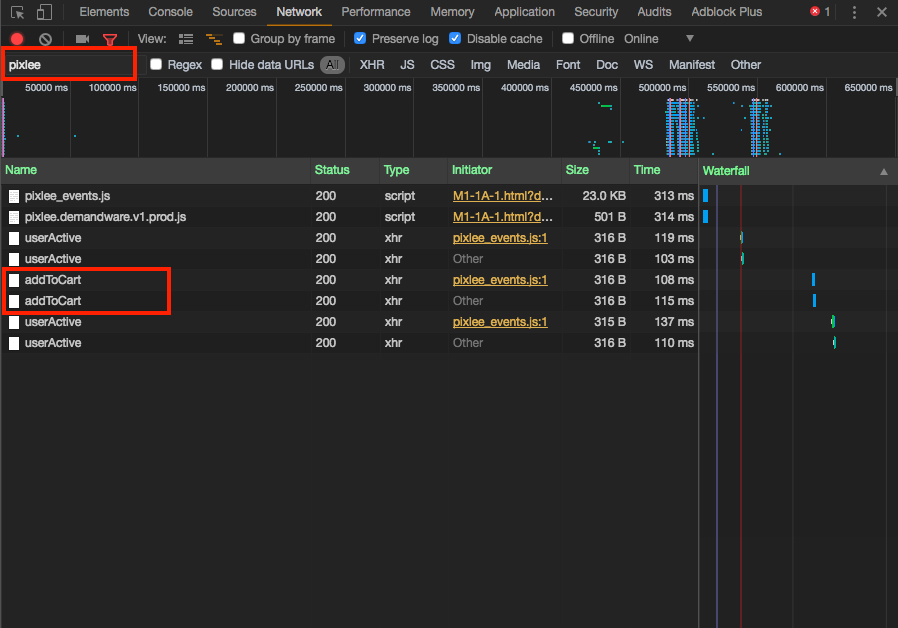
In the Filter bar type pixlee and that should reduce the number of results. And then look for two calls named addToCart in the results.
-
If you found the addToCart calls then your analytics were integrated correctly. If not, please revisit Analytics Setup or contact Emplifi support.
-
While keeping the Chrome Developers tools open, proceed to checkout and buy the product that you added to cart previously. Use a test payment method for the checkout.
-
When you reach the order confirmation page switch back to Chrome Developers Tools. This time look for Conversion calls in the result instead of addToCart.
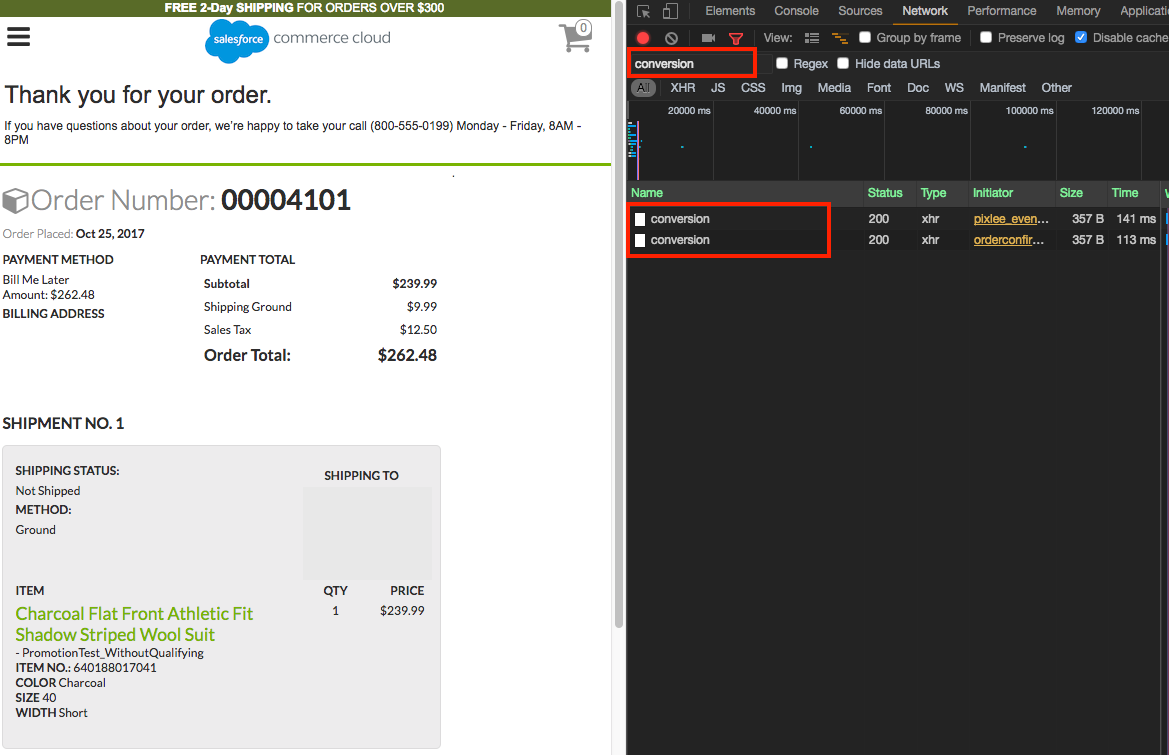
- If you do not see conversion calls like in the screenshot, please revisit Analytics Setup or contact Emplifi support.
Updated 3 months ago
