Triggered Email
Publish a Product Triggered Email Display
With Product Triggered Email Display, marketers can now automatically feature product-specific customer photos in their triggered emails (abandoned cart, post-purchase reviews, back-in-stock etc.) to add product context and relevance to their email marketing.
The last step in publishing a Product Triggered Email Display is to add ESP merge tags to enable system integrations for your triggered emails. This article is to help you understand what merge tags you will need to look for in your ESP and how to update Pixlee code snippet with them.
How to update Pixlee display code with ESP merge tags?
Within the code snippet for product triggered email display, you MUST find and replace ALL occurrences of the following {placeholders} with your ESP-specific merge tag or template variable in the code for Photo Gallery (provided html code surrounded by the ).
-
{sku}
-
{esp_user_id}
-
{esp_campaign_id}
-
{cta_link}

{sku}| To automatically feature UGC from specific products in triggered email.
Replace {sku} with a merge tag or template variable that identifies the sku of the product in your triggered email.
Shopify example: {{line.sku}}.
{esp_user_id}| For engagement and conversions analytics tracking.
Replace {esp_user_id} with a merge tag or template variable that identifies each user in your mailing list.
Shopify example: {{customer.id}}.
If your ESP does not provide a suitable merge tag/template variable for this you must still remove {esp_user_id}, but it's not necessary to replace it with anything
{esp_campaign_id}| For engagement and conversions analytics tracking.
Replace {esp_campaign_id} with a merge tag or template variable provided by your ESP that will be a unique identifier for your specific campaign or email that is being sent out.
Shopify example: {{template.name}}
NOTE: If your ESP does not provide a suitable merge tag/template variable for this you must still remove {esp_campaign_id}, but it's not necessary to replace it with anything.
{cta_link}| To direct customers to their own shopping cart
Replace {cta_link} with a merge tag or template variable that will be the link to a specific user's abandoned cart.
Shopify example: {{url}}
Note that this is only necessary if you chose "Shopping Cart" as your click-through link.
Please contact your ESP directly if you are having trouble finding the merge tags or template variables.
How to embed Pixlee display code in your triggered email template?
After finishing all steps in publishing a Product Triggered Email Display, you just need to copy and paste the following two snippets of code into your triggered email template:
-
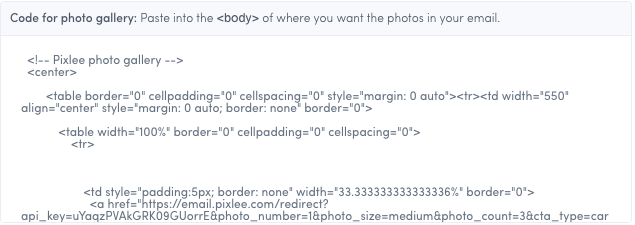
Code for photo gallery: the provided html surrounded by the
-
Code for analytics tracking: the provided html surrounded by the
Code for photo gallery
Copy and paste the provided html surrounded by the comments into the loop of your email template where your abandoned cart html is rendered or the specific product html template of your ESP.
This all varies by ESP, they all do something differently, contact Emplifi UGC support if you are having any trouble!
Code for analytics tracking
Copy and paste the provided html surrounded by the comments somewhere in the body of your email template.
This is the Pixlee's tracking pixel that allows us to track things like opens, etc. for analytics, so it is important that this code is only included once in any given email (i.e., Don't place it inside a loop).
Pixlee email examples, use cases and inspiration
Rollover CTA + Product Info + Auto Open Lightbox On Clickthrough
Old Navy Inspiration Email Sample
Auto Clickthrough to Category Filter
La Brea Inspiration Email Sample
Please contactsupport if you have any questions or need any assistance!
Updated 3 months ago
